GoPhish on AWS, Launch Phishing Campaigns From the Cloud
Reel Big Phish
Last year, Cloudflare released a phishing report that offered some insights into the state of modern phishing. 89% of security professionals felt multi-channel phishing attacks were a major threat to their organizations, and only one in four felt prepared to handle those threats.
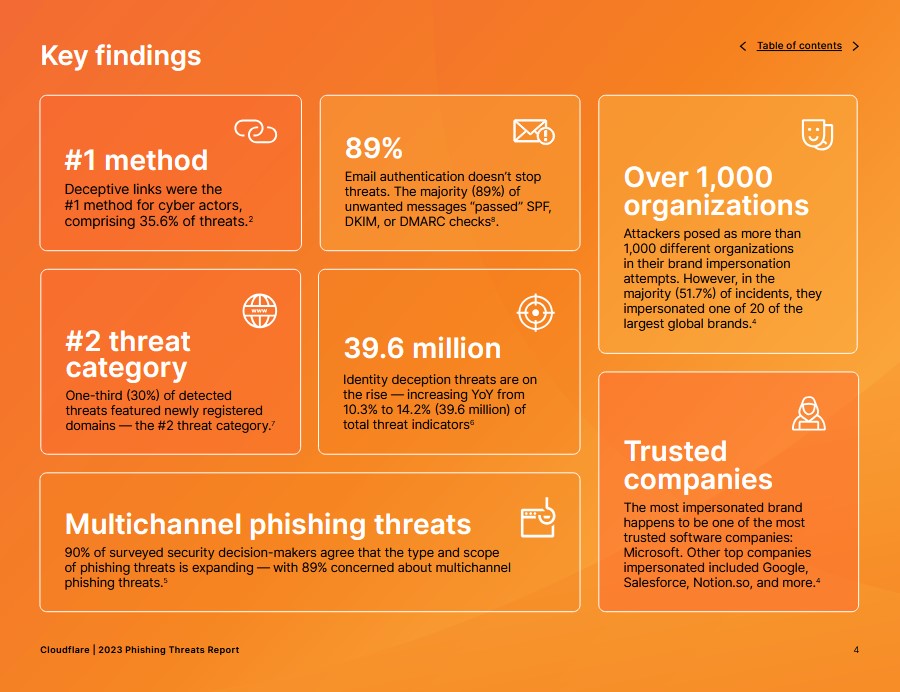 Image credit: Cloudflare | 2023 Phishing Threats Report
Security awareness training is crucial for defending against phishing attacks, but how can you ensure that your organization’s training is truly effective? Conducting internal phishing simulations is an excellent way to assess retention rates and identify if there are areas that need additional training. Luckily, it’s easier now than ever to launch your internal phishing campaigns by using software platforms to build them with ease.
In Comes Gophish
Gophish is an open-source framework for crafting your own custom phishing email templates, landing pages, and reports. It has plenty of awesome analytics features like click and submission tracking. It’s super simple to set up and I’ll show you how.
I’ll be configuring an Amazon Web Service (AWS) EC2 instance running Docker and Portainer. I’ll show you how to set up the instance, create an elastic IP, set up a Gophish Docker container with Portainer, and create your very first phishing campaign. Let’s get phishing! 🎣
LEGAL DISCLAIMER: Do not attempt phishing against businesses or individuals who have not authorized you to do so. This is for learning purposes only.
Creating an EC2 Instance
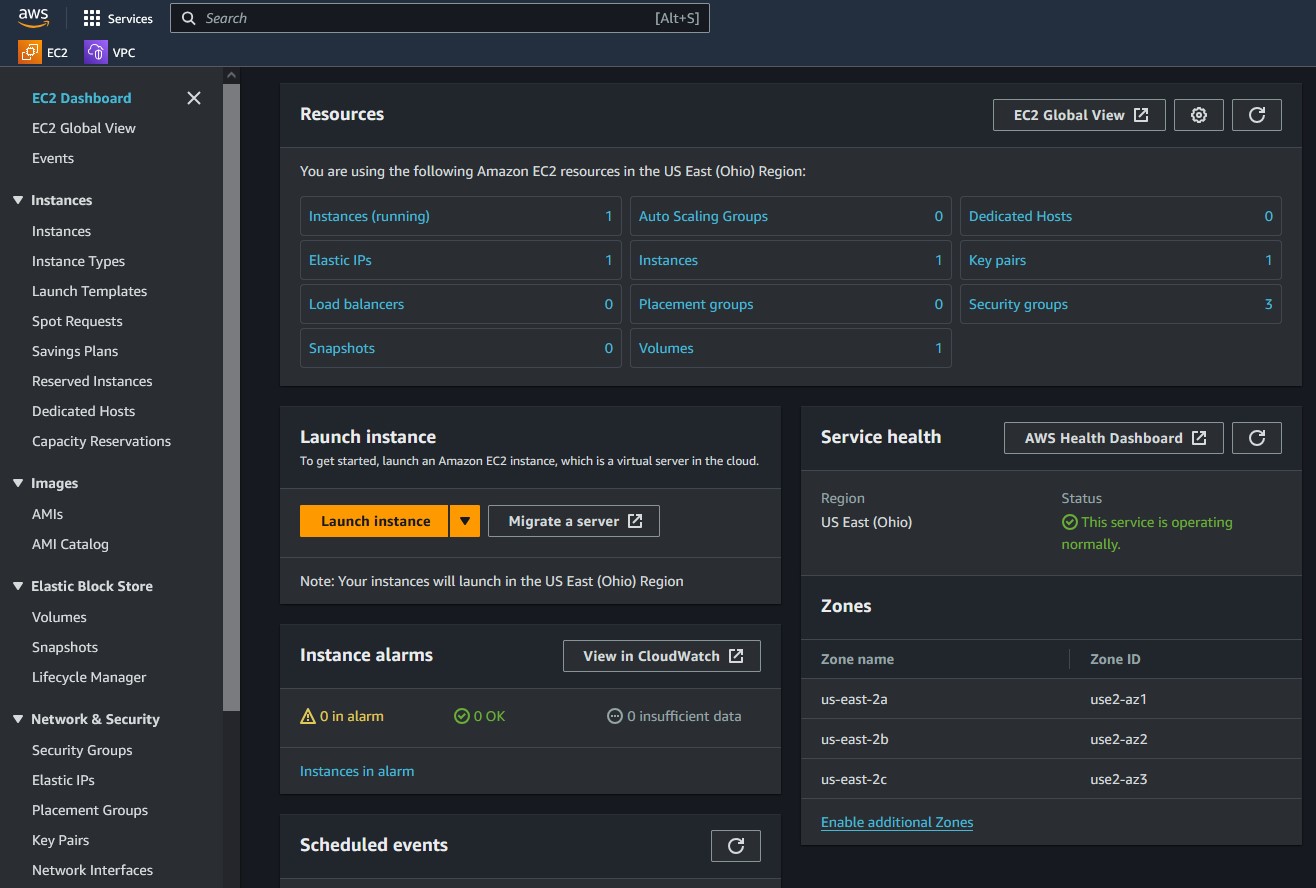
In the search bar enter EC2 and then select the service from the search results. From the EC2 dashboard, choose ‘Launch Instance.’
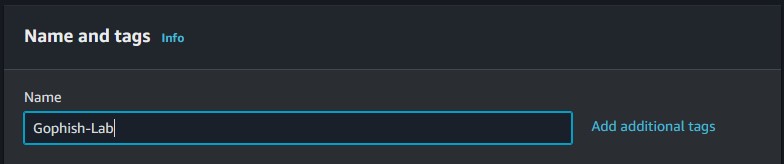
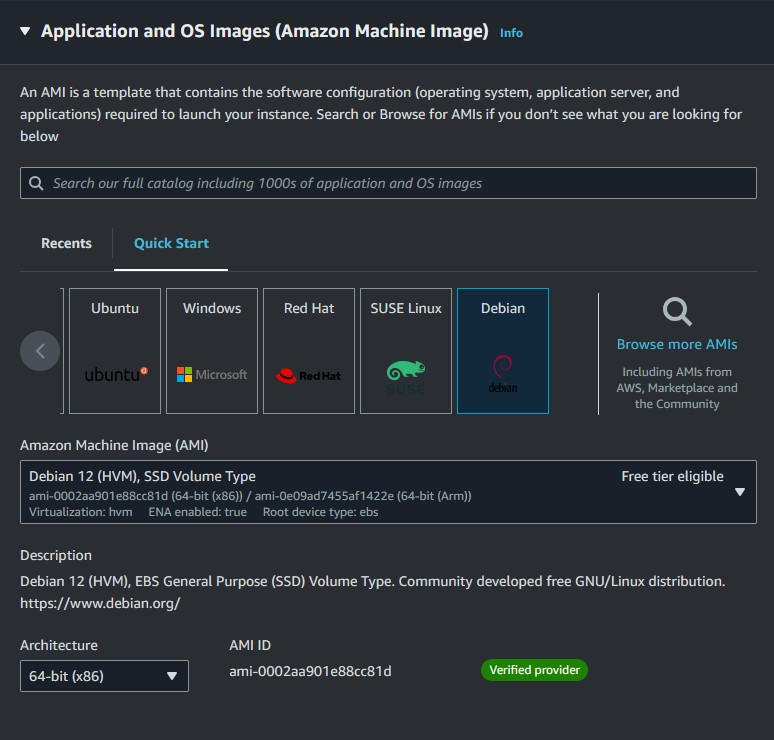
Name your server something appropriate like Gophish-Lab. For the OS image choose whichever Linux distribution you prefer. I’ll be using Debian.
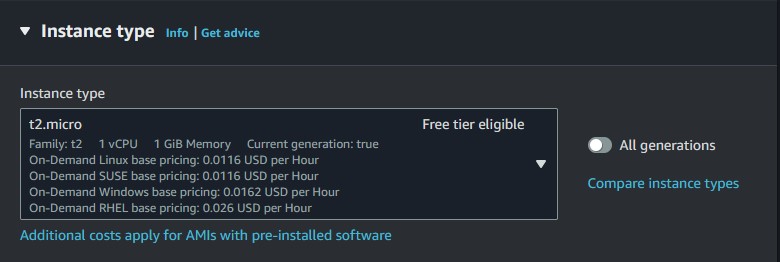
You can leave the instance type as Micro.t2. It should be more than enough for the purposes of this phishing lab.
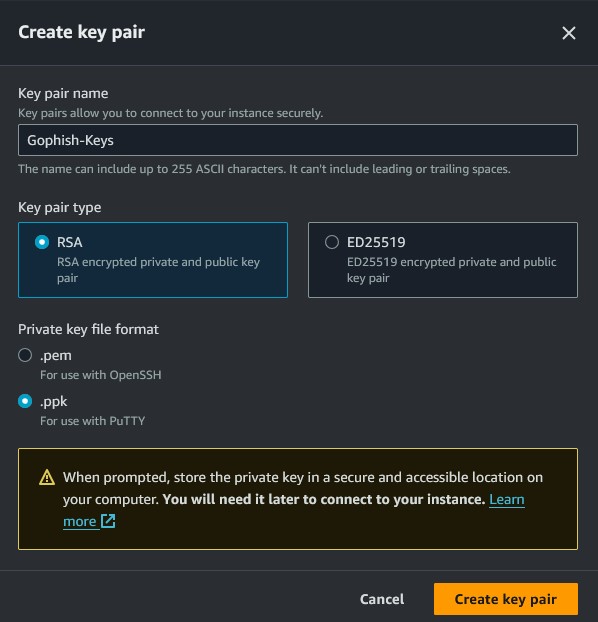
Create a new private SSH key-pair. Choose whichever encryption standard and file format you want. I’ll be using PuTTY for SSH, so I’ll choose RSA and save as a .ppk file. Feel free to use whatever SSH client you want, just remember to choose the correct file format. Remember to store your keys in a secure location as well.
The network settings can remain as is unless you want to use a custom VPC and subnet like I have done. You are going to need to add a new security group. Make sure your rules look the same as mine.
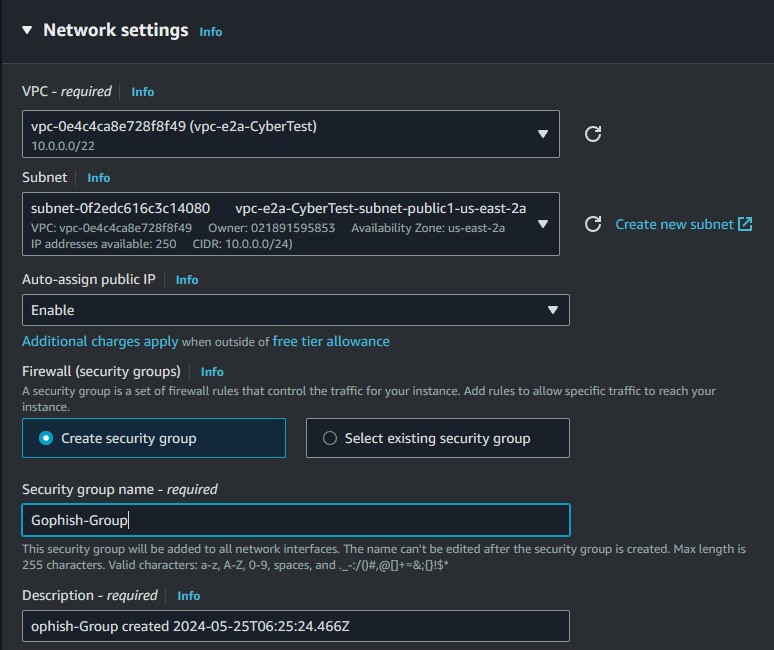
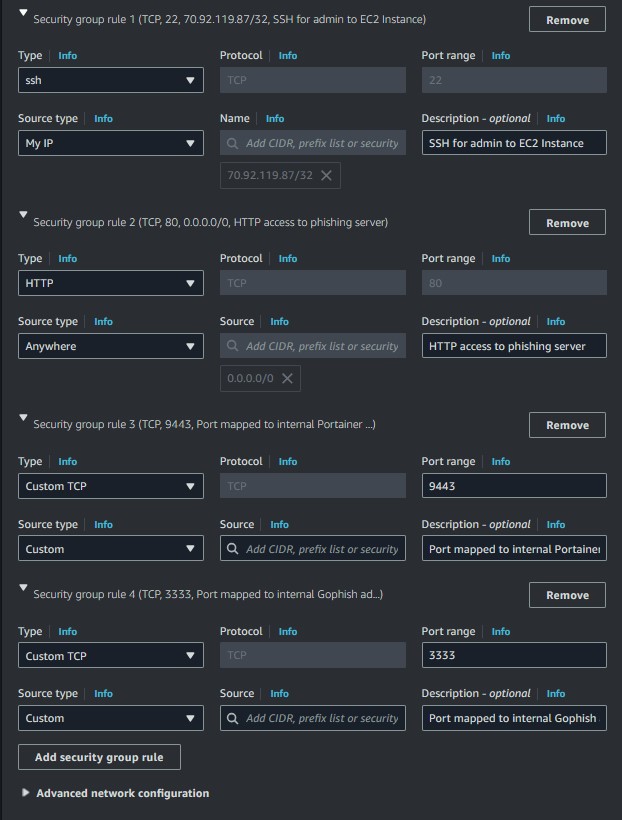
These rules ensure that you can SSH into the instance, access the Portainer and Gophish web interfaces, and the victim can reach the landing page you will create. The instance setup is now complete.
Creating & Linking an EIP
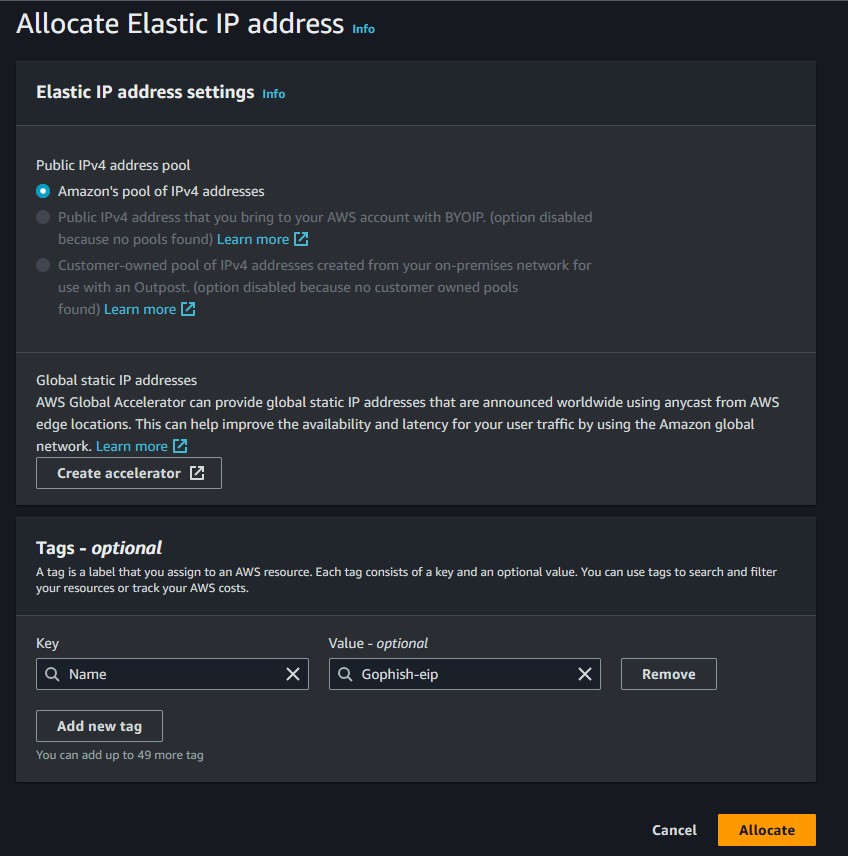
Later, you’ll have to set the IP address for the Gophish listener to the public IP address of the instance. An elastic IP address is a static address for your instance, so you won’t have to reset the listener every time you use Gophish.
Under Network & Security, go to Elastic IP and click Allocate Elastic IP address. Put Name for the key and then give it whatever value you want.
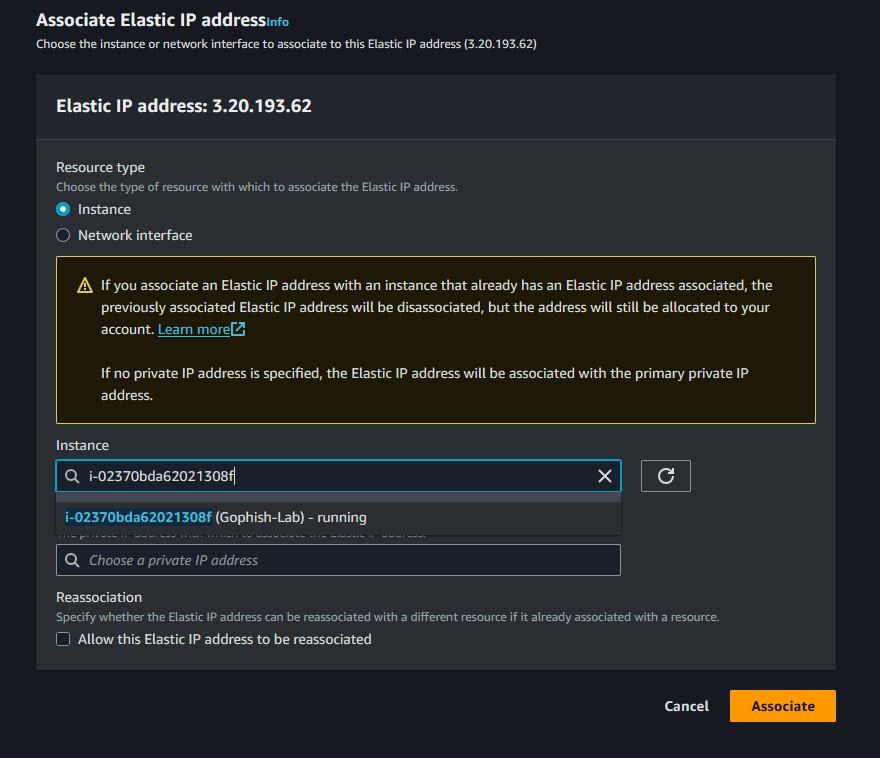
Once it’s allocated, right-click on it and then click Associate Elastic IP address. Choose your instance and then click ‘Associate’.
PuTTY Setup
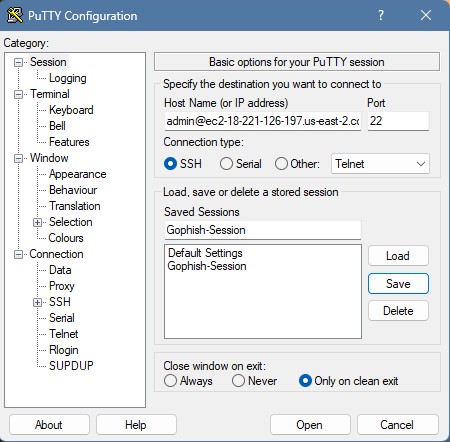
If you’ve chosen to use another SSH client other than PuTTY, you can skip this section. Launch PuTTY and fill in the default instance username (which is admin for the Debian AMI) and the public IPv4 DNS of the instance. You can copy it by clicking on it from the instance list.
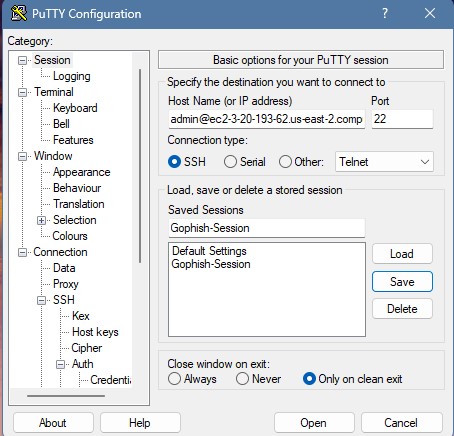
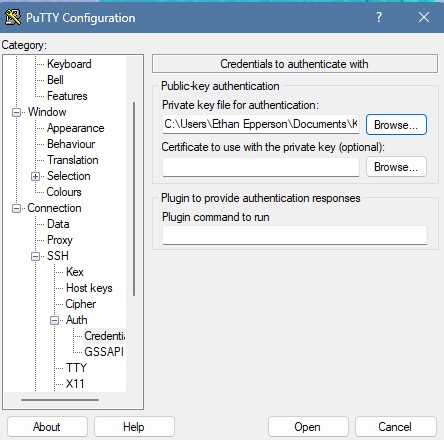
Go to the Auth window and insert the public/private key pair.
Go back to the Session window and save the current session as a new session profile. Now, you can connect.
Gophish Installation on Portainer
In the interest of saving both of us time, you can follow the Docker installation guide and the Portainer installation guide from their respective providers. If you’ve chosen a different Linux distribution, make sure to find the correct documentation for the one you chose. For Portainer, choose the community edition during installation.
You can access the Portainer UI at the following address:
https://<Instance_Public_IP>:9443
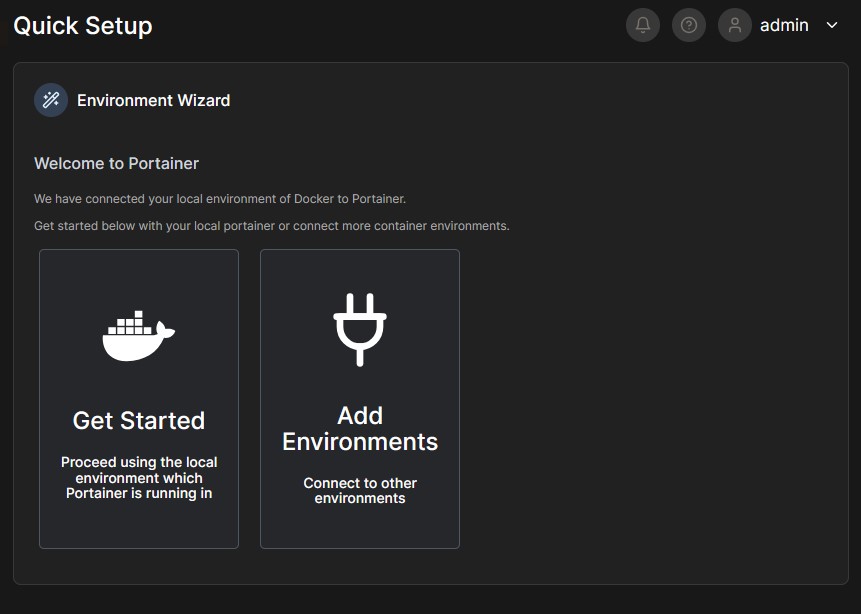
Create a new username and password. You’ll be redirected to the environment setup wizard. Choose Get Started to connect to the default local environment, and then click Live connect.
We are going to have to deploy a new stack in our environment, but first, you’ll need to add a new data directory path for the stack and give it permissions.
Execute the following commands from the root directory:
sudo mkdir -p /srv/gophish/data
sudo chown -R 1000:1000 /srv/gophish/data
I’ll be deploying Gophish using the official image. In the Portainer sidebar, click on Stacks, and then click Add stack. Name your stack something appropriate like gophish-stack. Copy and paste the following yml configuration file into the web editor.
services:
  gophish:
    image: gophish/gophish:latest
    restart: always
    ports:
      - "3333:3333"  # Map host port 3333 to container port 3333 for admin server (HTTPS)
      - "80:80"      # Map host port 80 to container port 80 for phishing server (HTTP)
    environment:
      GOPHISH_INITIAL_ADMIN_PASSWORD: gophish  # Initial password to access the admin portal; you will be forced to change it afterward.
    volumes:
      - gophish:/data
    labels:
      - "com.example.description=Gophish Service"
      - "com.example.version=latest"
    deploy:
      resources:
        limits:
          cpus: "0.5"  # Limit to 0.5 CPUs
          memory: "512M"  # Limit to 512 MB
        reservations:
          cpus: "0.25"  # Reserve 0.25 CPUs
          memory: "256M"  # Reserve 256 MB
    logging:
      driver: "json-file"
      options:
        max-size: "10m"
        max-file: "3"

volumes:
  gophish:
    driver: local
    driver_opts:
      type: "none"
      device: "/srv/gophish/data"
      o: "bind"
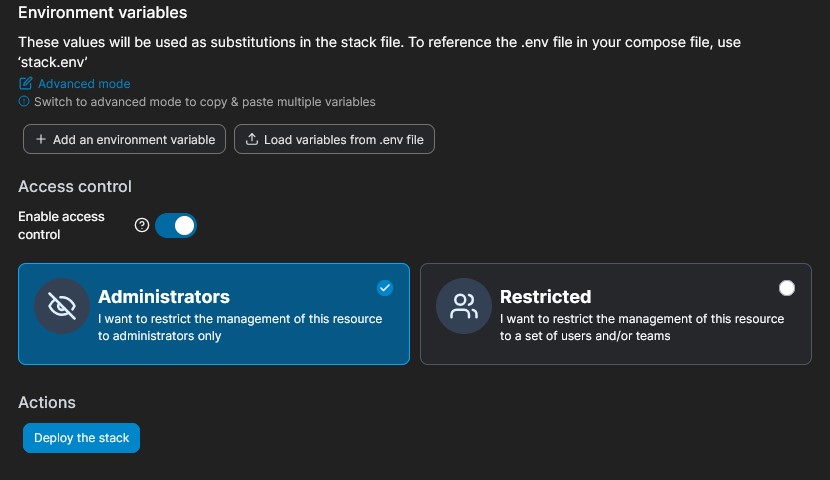
Once you’ve done that, make sure Administrators is highlighted and then click Deploy the stack.
If you go to Containers, you’ll see the Gophish container was deployed by the stack with the mapped ports we specified in the config file.

To access Gophish, enter the following address:
https://<Instance_Public_IP>:3333
Configuring a Sending Template
Log in with your credentials for Gophish, and you will be prompted to reset them.
Once that’s done, you will need to set up a sending profile. This will define how emails are sent from the platform and which email address will be used. Here’s what it should look like:
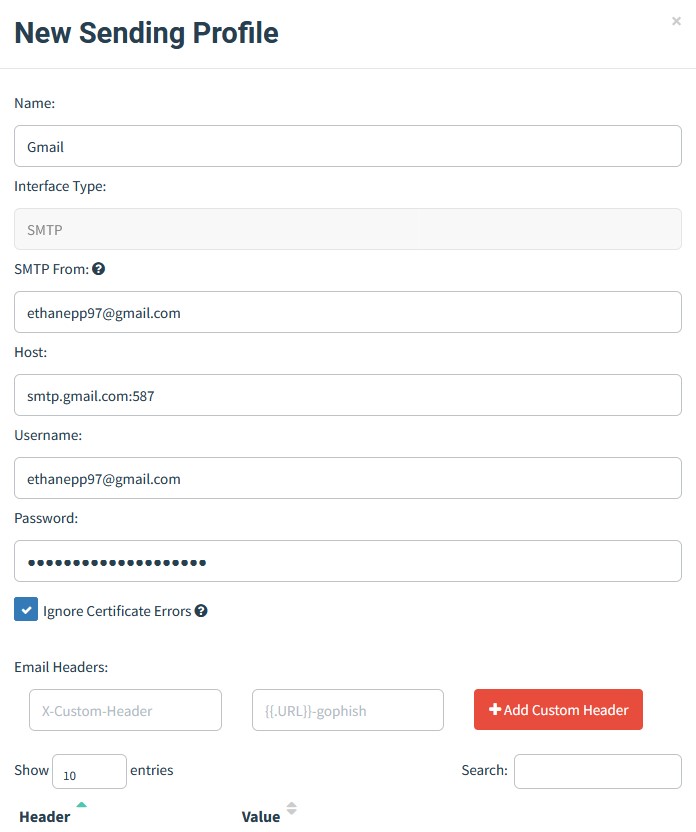
SMTP From is the address that will be used to launch campaigns. Use something that fits the email template you will create later. Consider spoofing the address if needed, but setting that up is a topic for another day.
Host specifies the SMTP relay server. There are many SMTP servers you can use, so I encourage you to find one you like. I’ll be using Google’s because it’s free, reliable, and easy to use.
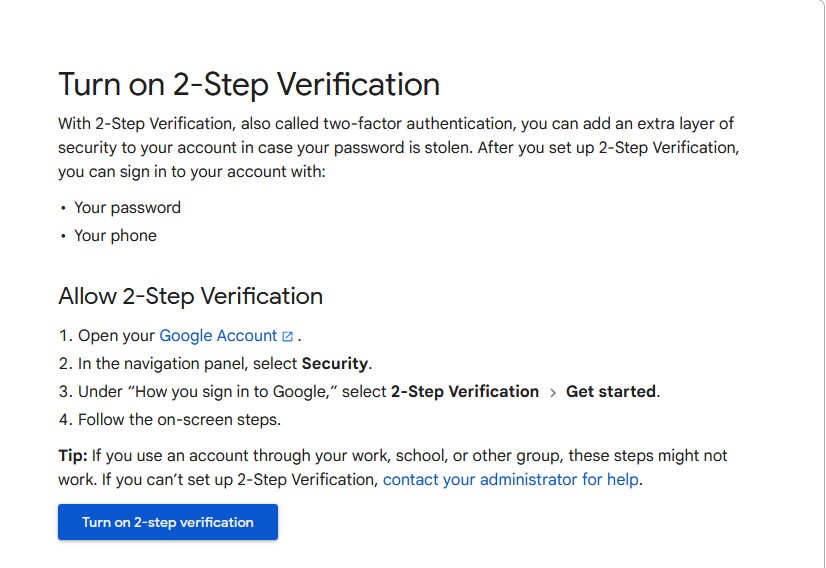
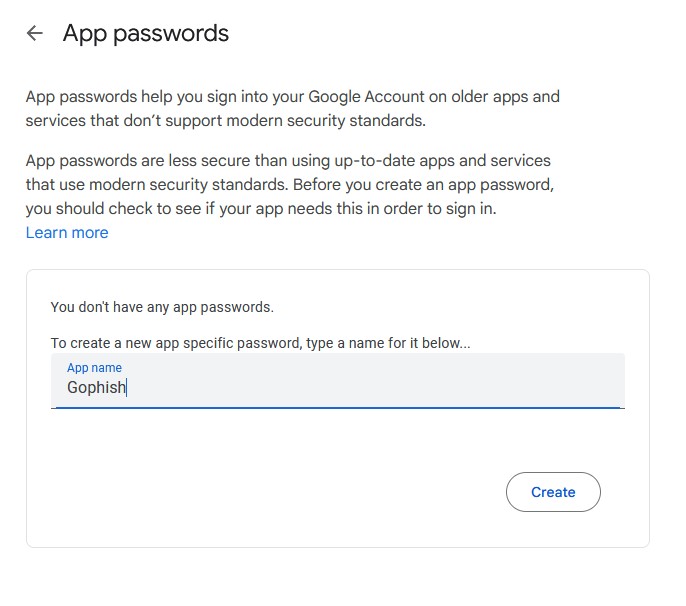
Password is not the actual password for your account but an app password for the Gophish service that you will need to set up beforehand. Two-factor authentication is required before you can create app passwords.
Once that’s done, you can submit a test email to make sure the profile is working correctly.
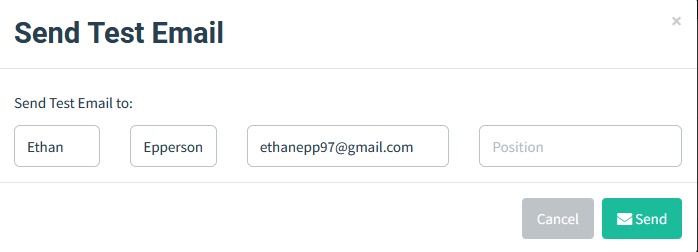
Check your email to make sure it was sent, and then save the profile once you’ve confirmed everything is in working order.

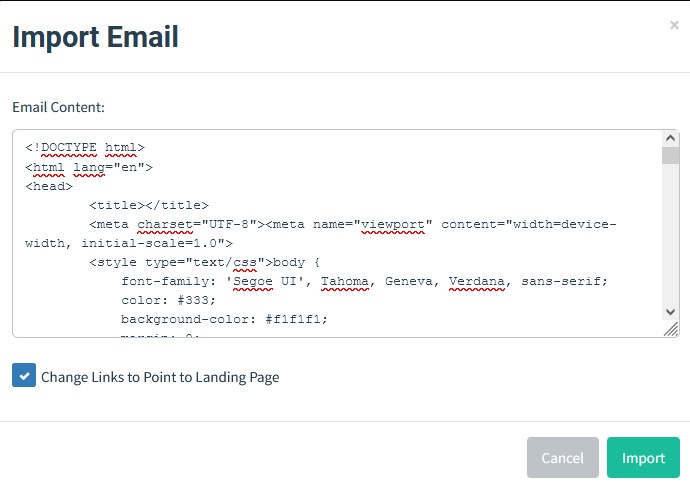
Importing an Email Template
The next step is to get an email template set up; this is where you customize the look of the email you want to send. For this example, I’m using a template I created that mimics a suspicious sign-in alert email from the Microsoft account team. There are several different templates you can find on GitHub with a little searching. Click on Import Email and paste in your HTML. Make sure to check the Change Links to Point to Landing Page box.
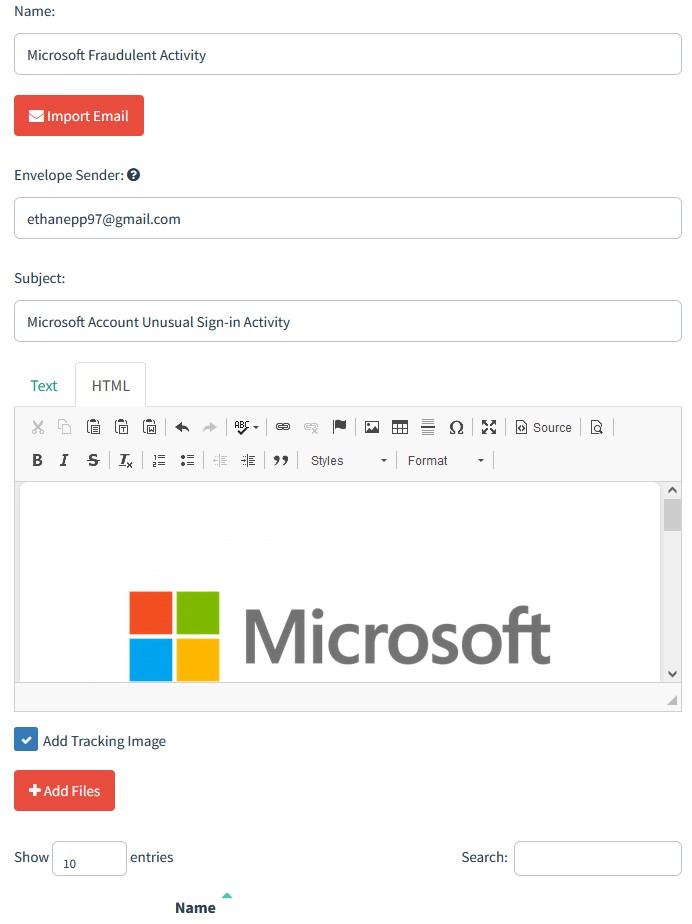
For Envelope Sender, make sure it matches the sending profile email address.
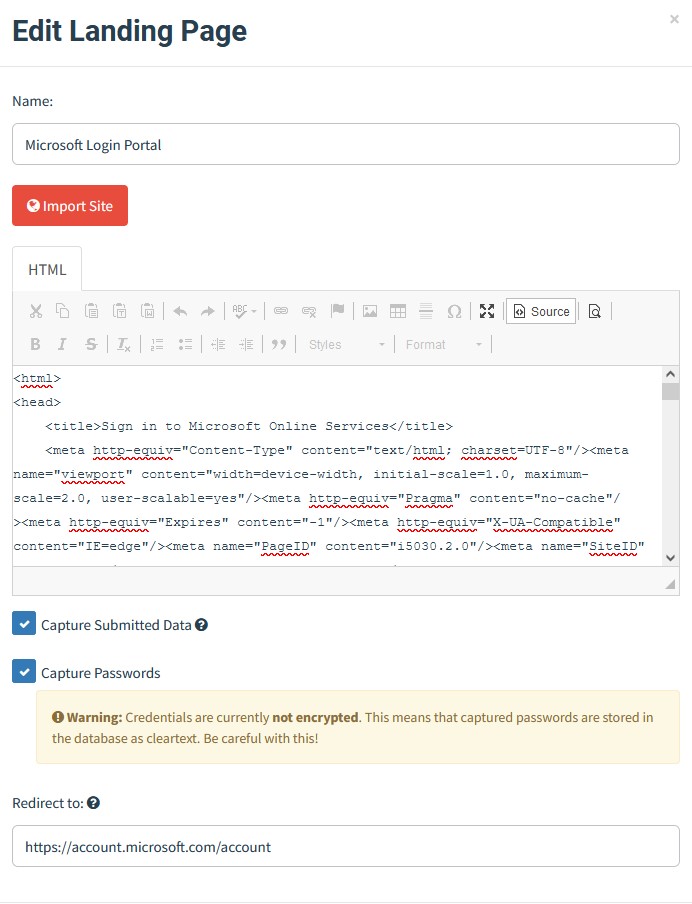
Configuring a Landing Page and Group
The landing page is where users will find themselves after clicking the link in the email. I found a nice Microsoft Office 365 login page template created by FreeZeroDays on GitHub. Ensure that Capture Submitted Data and Captured Passwords are both enabled. You can redirect the page to anything you’d like. I’ll point it towards the Microsoft account homepage. This is where you could redirect employees to a page informing them they’ve just participated in a phishing campaign if you wish.
Finally, you’ll need a new group. This step is pretty straightforward. Add your target victim’s email address and any position you want to attribute to them, then click +Add. You can even bulk import groups through CSV files.
Putting it All Together: The First Campaign
At long last… we’ve finally arrived at the good stuff. All the legwork has been done, so now you just have to plug in everything and add your public IP address. The campaign will be sent out. Now, let’s check our victim’s email address and see what our email looks like.
Let’s assume the role of the unsuspecting victim and click our convincing link. An untrained eye might say that it looks pretty official. You could make it even more convincing with domain spoofing and an SSL certificate depending on how far you want to take the testing.
Enter some fake credentials and hop back over to Gophish. You’ll be able to see the entire timeline of events with statuses for each user such as Clicked Link or Submitted Data. You’ll even get specific timestamps as each event occurs.