
Restricting IPs by Region with AWS WAF Geographic Match Rules
Pop, Geo Block, and Drop It
What if your web application is being targeted by attackers from a notorious global region with a higher frequency than others? Instead of waiting for a breach, you can preemptively block traffic from that area, cutting down your risk and streamlining security. AWS WAF makes this a breeze with geo-location matching rules! I’ll show you how to harness them in this AWS WAF guide. Let’s get started!
Why Would You Want to Setup This Rule?
- Tailored Access Control
- Regional Compliance: Certain regions may have legal or compliance requirements, so you can restrict access based on geographic location to meet these standards.
- Localized Content: If your app or site serves specific regions with tailored content or services, geographic rules ensure only those users get the right experience.
- Mitigating Threats
- Blocking Malicious Traffic: Sometimes, attacks come from specific regions or countries. Geographic rules help you block traffic from those areas, reducing the risk of attacks.
- Reducing Fraud: If your business operates only in specific regions, you can prevent fraudulent activities by blocking traffic from outside those areas.
- Optimizing Performance
- Load Management: By blocking unnecessary traffic from regions where you don’t operate, you can reduce server load and improve performance for legitimate users.
- Cost Efficiency
- Saving on Data Transfer Costs: By filtering out unwanted traffic, you can potentially lower data transfer costs associated with handling requests from regions you don’t serve.
Adding the Geographic Match Rule
If you haven’t already created a Web ACL go ahead and do so. I’ll be using my ACL that I’ve created and associated with my application load balancer that manages my Damn Vulnerable Web App (DVWA) instances.
Go to your WAF management console and access your ACL. Click Rules and choose add my own rules and rule groups from the dropdown menu.
Follow these instructions to setup the geographic match rule:
- Give your rule an appropriate name.
- Under
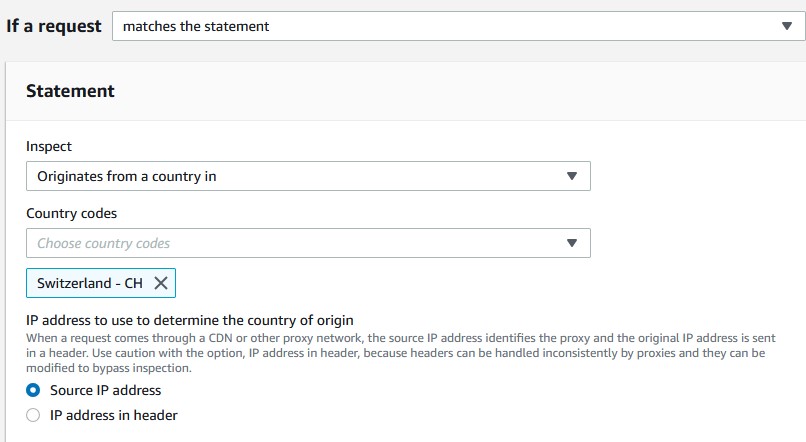
If a request, choosematches the statement. - For the inspect type choose
Originates from a country in. - Choose your country code, I will pick
Switzerland - CHsince Zurich is the primary location I use for my VPN. - Keep
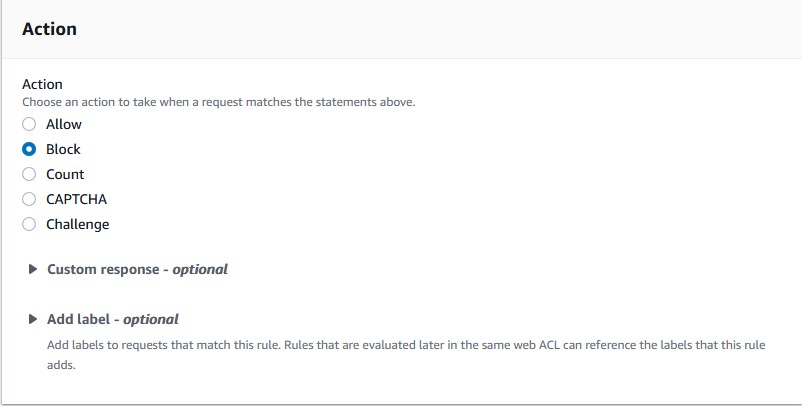
Source IP Addressselected. - For the action, choose
block. - Click
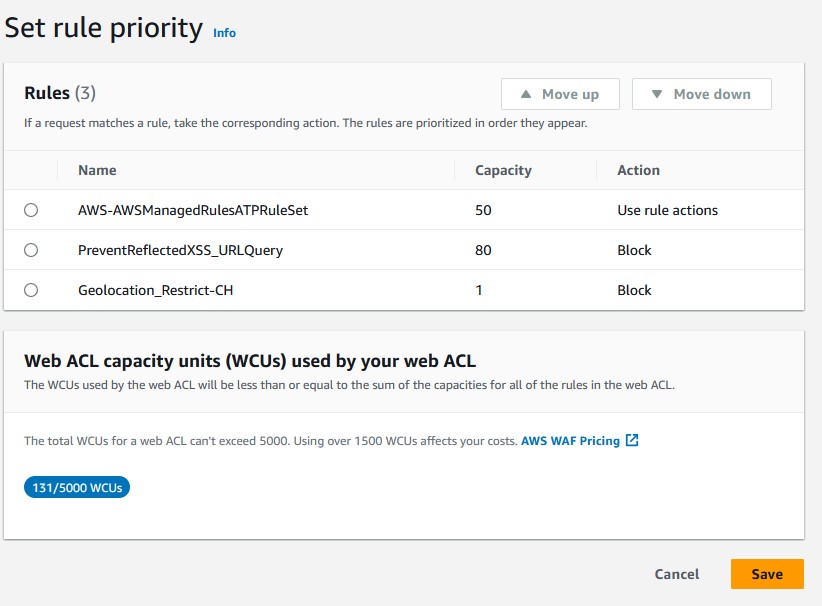
Add rule. - Review your rule priority and then click
save.

Now your ACL is configured to block all traffic from the specified county. If you don’t have a VPN to verify the rule works correctly, then you can skip the next step. Otherwise, continue on.
Testing the Geographic Match Rule
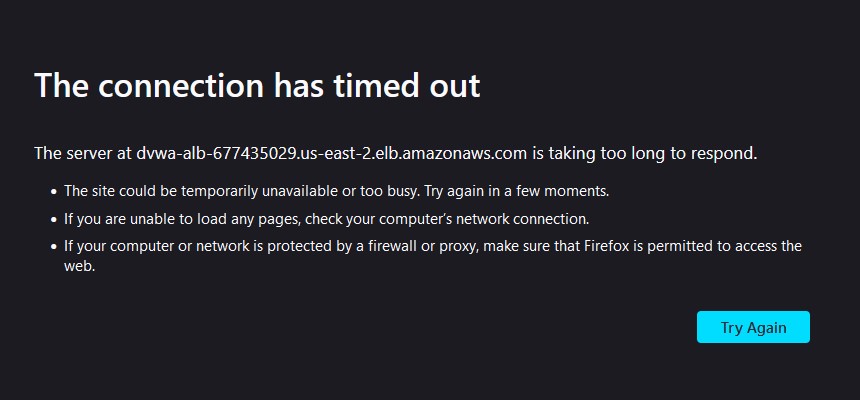
Boot up your VPN and select the region that you just created the rule for. I’ll connect to the VPN server in Zurich, Switzerland using Mullvad VPN. Try to access DVWA from the load balancer and, what’s that? Oops, you’ll either get a connection timeout or a 403 error! The geolocation restriction rule works and now you can restrict by country to your hearts content.
Food For Thought
Now that you’ve set up geo-blocking with AWS WAF, consider these points:
- Dynamic Adjustments: Regularly review and adjust your geographic rules to respond to emerging threats and shifting traffic patterns.
- Combine with Other Rules: Enhance security by combining geographic rules with other WAF features like rate-based rules or IP whitelisting for a multi-layered defense strategy.
This one was short and sweet, but you can find a variety of my other security and networking posts under the categories and tags pages.