Leverage AWS WAF ACLs to Prevent XSS Attacks
SSX XSS Tricky
Cross-Site Scripting (XSS) is one of those pesky vulnerabilities that can slip through the cracks if you’re not paying attention. Imagine a user unknowingly triggering malicious scripts just by visiting a webpage—it’s a security nightmare and a goldmine for attackers. Here’s the good news: with AWS Web Application Firewall (WAF) Access Control Lists (ACLs), you can put up a solid defense against these sneaky threats.
In this post, I’ll break down how AWS WAF ACLs work, why they’re a crucial part of your web security toolkit, and how you can configure them to keep XSS attacks at bay.
Price Disclaimer
PLEASE NOTE: Web ACLs, rules, and requests are not covered by the AWS free tier. The price guidelines for AWS can be found here. Here’s my quick breakdown of what it would cost you if you use the service for just a single hour:
- Web ACL Cost
- Monthly Rate: $5.00 per month.
- Hourly Rate: $5.00 ÷ 720 hours ≈ $0.00694 per hour.
- Rule Cost
- Monthly Rate: $1.00 per month.
- Hourly Rate: $1.00 ÷ 720 hours ≈ $0.00139 per hour.
- Total Cost for One Hour:
- Web ACL Cost: $0.00694
- Rule Cost: $0.00139
- Total Cost: $0.00694 + $0.00139 ≈ $0.00833
This amounts to essentially a single cent. You don’t have to worry too much about costs, but I figured I’d let you know if it bothers anyone that much. If you’re still here, you can continue ahead. Remember to delete the ACLs and rules after you’ve completed any WAF labs so you don’t incur any unnecessary costs.
What’s a Web Application Firewall?
Web application firewalls, or WAFs, are essential guardians in the modern web application security landscape. They help defend against common attacks, provide instant threat mitigation, ensure regulatory compliance, offer high customization, and provide actionable insights through logging and report generation. In other words, they can do a lot of awesome stuff.
I would absolutely recommend checking out this Palo Alto Networks article if you want a comprehensive breakdown of WAFs and need a place to start. I’ll assume you already have a basic foundation of knowledge if you’ve found this guide.
Enter AWS WAF
AWS WAF is Amazon’s proprietary WAF service. It’s a flexible, cloud-based firewall that lets you create custom rules, use managed protections, and dive into detailed logs. It has seamless integration with AWS services like CloudFront and Application Load Balancers. It can scale with your needs, offering a cost-effective way to boost your app’s security with features like rate-based rules, bot control, and geo-blocking. Let’s customize the WAF now to protect against XSS.
Testing For XSS
I am running a containerized version of DVWA on a load-balanced EC2 instance, so I already know that XSS is possible, but let’s see what the attack looks like in demonstration before we end up blocking it. I’ll try a simple reflected XSS attack.
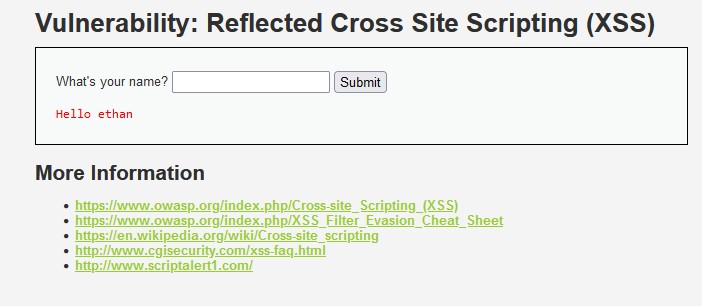
Threat actors first identify a website that reflects user inputs back to the page without proper sanitization or encoding. This can be a search bar, comment section, or any input field the user can submit data.
Go to the XSS (Reflected) page on DVWA. We see it has a simple input field for submitting a user’s name. Enter your name and test it out. You should get a reflected message in the box and a newly created query string, name=<your_name>, in the URL. We can assume that the application is vulnerable to reflected attacks if this happens.
Enter a simple script that will create an unintended alert message:
<script>
  alert("I’m Commander Shepard, And This Is My Favorite Store On The Citadel!");
</script>
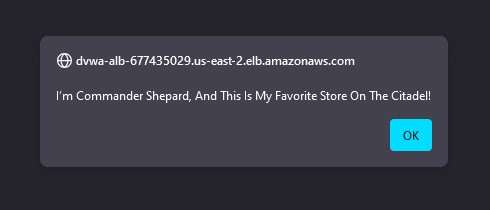
It works! The malicious code was successfully injected. Click OK to get back to DVWA. Now any time the page reloads or the affected content is displayed, the browser will trigger our alert script. This is a massive vulnerability that could be exploited for far more malicious activities like stealing cookies, injecting malware payloads, hijacking sessions, or defacing websites. Let’s move onto fixing the XSS vulnerability with WAF ACLs.
Creating the Web ACL
Web access control lists (ACLs) are security features provided by WAFs that control access to your web applications. It’s basically the container for your rule sets that manages and monitors traffic based on those rules contained within.
Search for WAF and click on WAF & Shield to get to the AWS WAF management console. Click on Web ACLs and choose Create web ACL. Make sure to select the region that is appropriate for you.
We will create a basic web policy ACL that will encompass rules to protect against a variety of attacks that will be covered in future posts.
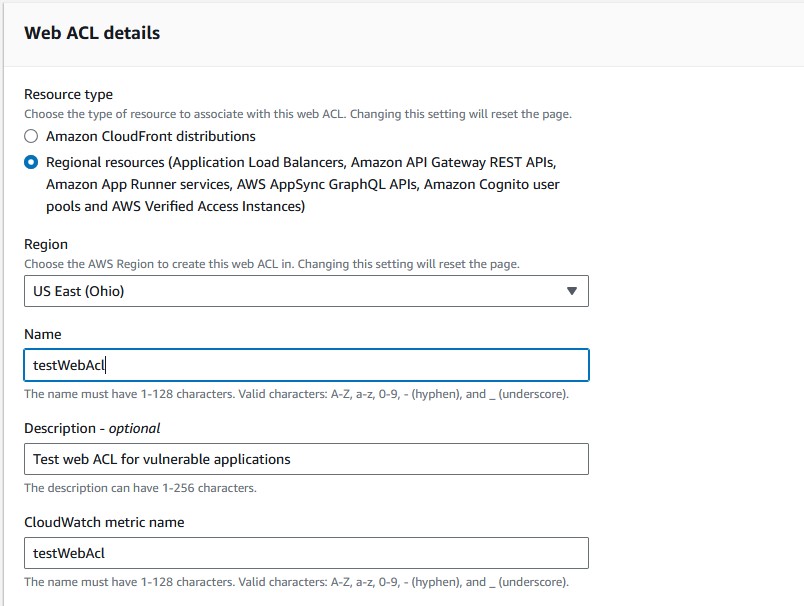
Follow these instructions to setup the web ACL:
- Keep the resource type as
Regional resources. - Give your ACL an appropriate description and name.
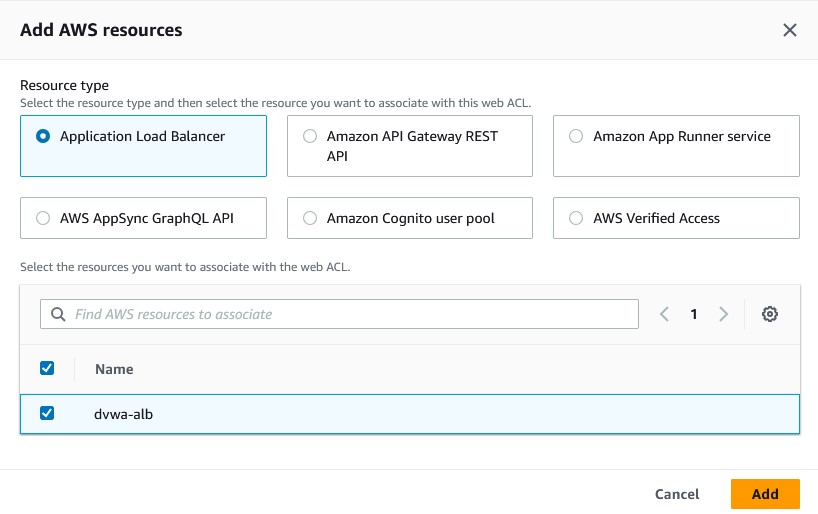
- Click on
Add AWS resources, selectApplication Load Balancer, and then choose the ALB associated with your web application. - Click
Next.
Creating the XSS Rule
Complete these steps to create a rule that filters out XSS attacks:
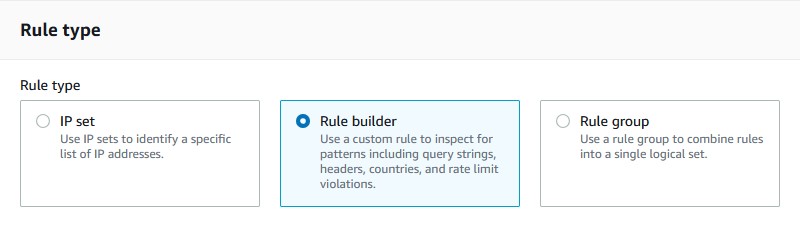
- Under the
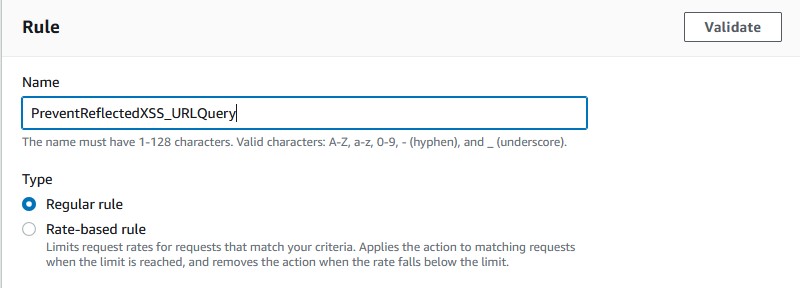
Add Rulesdropdown menu, chooseAdd my own rules and rule groups. - Name your rule something appropriate and then select the type
Regular rule. - For
If a requestchoosematches the statement. - Change
InspecttoQuery string. - Leave the content type as
Plain text. - Set match type to
Contains XSS injection attacks. - Include 4 text transformation rules:
HTML entity decode,URL decode,JS decode, andLowercase. These transformations ensure that the WAF rule can better detect XSS attacks that use obfuscation through various encoding techniques and case variations. These are a strong foundation, but you could always add more transformations to rules at a later point in time for increased protection. - For the action, choose
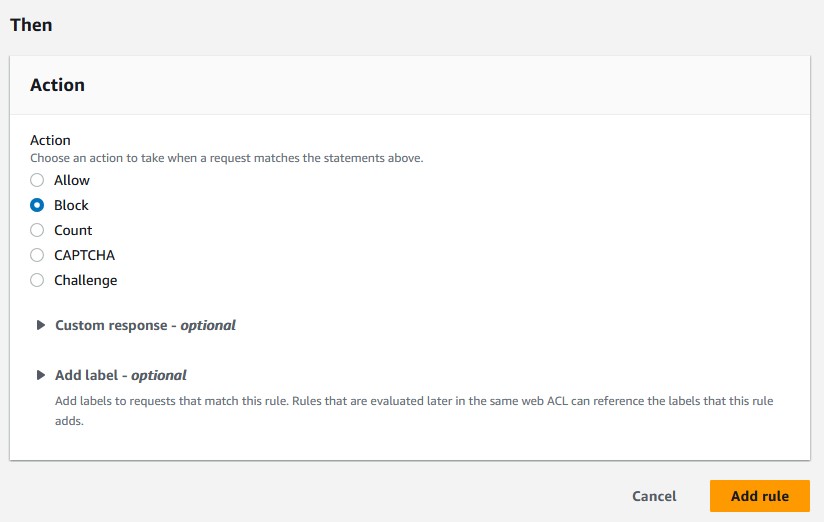
Block. - For
Oversize handlingselectContinue. - Click
Add rule.
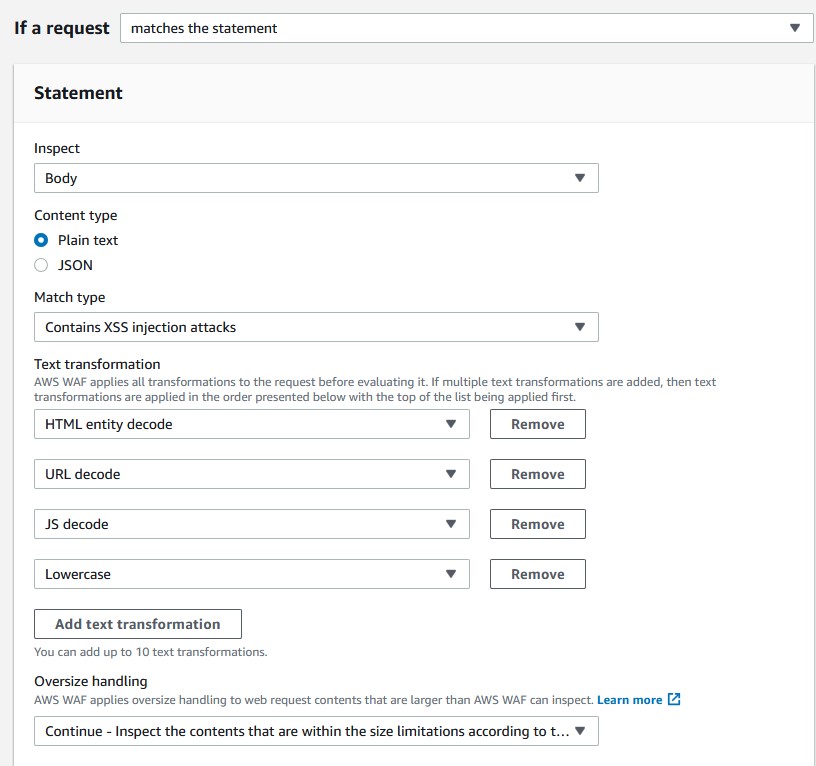
The rule has been created! It inspects query strings, the part of the URL used to pass parameters to the web server, for XSS injection attacks by checking if they contain malicious payloads. It uses text transformations to decode and normalize various obfuscation techniques before blocking requests that match the criteria.
Go back to the ACL setup and you’ll see the rule has been populated in the ACL. It’s currently using 80 out of the 5000 web ACL capacity units. Every web ACL will have a maximum capacity that you cannot exceed and creating more rules adds more capacity.
Creating the Web ACL Continued
Let’s finish up creating the ACL. Follow these steps:
- Leave the default actions for requests that don’t match any rules to
Allow. - Click
Next. - Since you only have one rule for now, you won’t have to worry about rule priority. Select the rule and click
Nextagain. - Click
Nextand review the configuration. ClickCreate web ACLwhen you’ve confirmed everything looks correct.
Testing the Web ACL XSS Rule
Go back to your DVWA web application, and try to perform another XSS attack. You should end up getting a 403 forbidden error. Congrats, you’ve successfully set up your web ACL to prevent XSS attacks. You could always come back later and make the rule even stronger through the use of regular expression sets. You could also use managed rule sets from Amazon or other resources that include pre-configured rules, although most are charged.
Food for Thought
- Update Regularly: XSS attacks evolve, so keep your WAF rules and transformations current to handle new payloads.
- Combine Measures: Use AWS WAF with Content Security Policy (CSP) headers for layered protection against XSS.
- Test and Refine: Regularly test your rules with various XSS payloads and adjust based on new threats.
- Educate and Monitor: Train your team on XSS risks and monitor WAF logs to catch and analyze attacks.