Mastering Elastic Load Balancers for Optimal Performance
You’re Missing out on Optimized Cloud Traffic
Welcome to my post all about AWS Elastic Load Balancers (ELBs). Whether you’re running a simple web app or a complex microservices architecture, you might be missing out on efficient traffic distribution if you aren’t using this AWS feature.
What is AWS ELB?
AWS ELBs automatically distributes incoming application traffic across multiple targets, like EC2 instances, containers, and IP addresses. This ensures no single instance is overwhelmed, enhancing your application’s scalability and fault tolerance.
Why You Should Use One
- Boost Performance: Balance the load to improve application responsiveness.
- Achieve High Availability: Keep your app running smoothly even during instance failures.
- Enhance Security: Utilize built-in features like SSL/TLS termination and integration with AWS security tools.
- Simplify Management: Focus on your application while AWS manages the load balancing infrastructure.
Ready to streamline your cloud traffic and boost application reliability? I’ll show you how to set up AWS Elastic Load Balancer for your EC2 instance with ease.
Selecting a Balancer Type
I’ll be setting up an application load balancer for my DVWA penetration testing instances. ALBs are types of ELBs that specialize in application-level load balancing as the name suggests.
To create an ALB, complete the steps below:
- Open your Amazon EC2 console.
- From the side navigation bar, find
'Load Balancing'and choose'Load balancers'. - Choose
'Create load balancer'. - Under
'Application Load Balancer', choose'Create'.
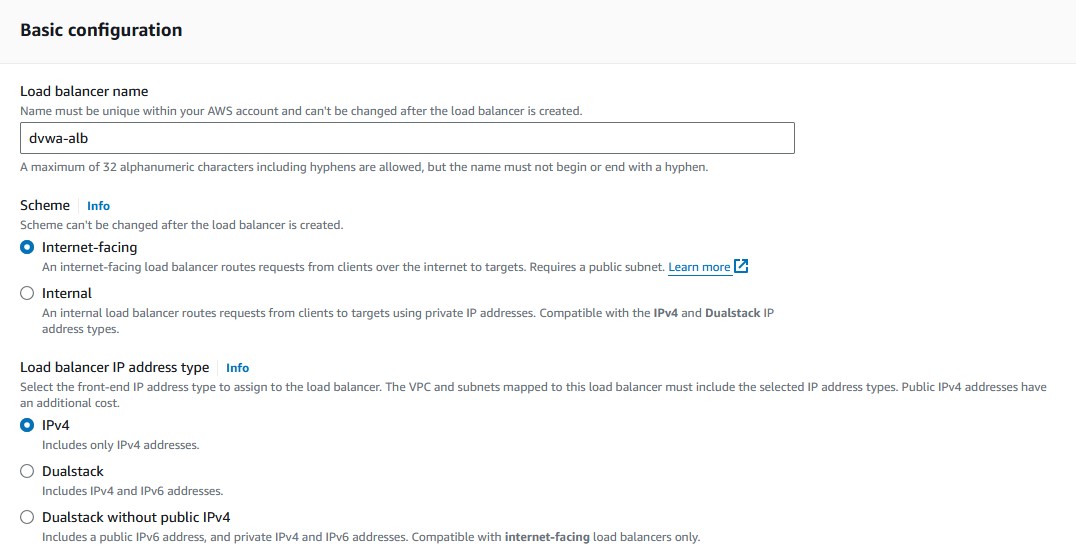
Basic ALB Settings
Run through the installation and configure your load balancer as such:
- Give your ALB a name under
'Load balancer name'. - Keep the scheme as
'Internet-facing'. - Keep the address type as
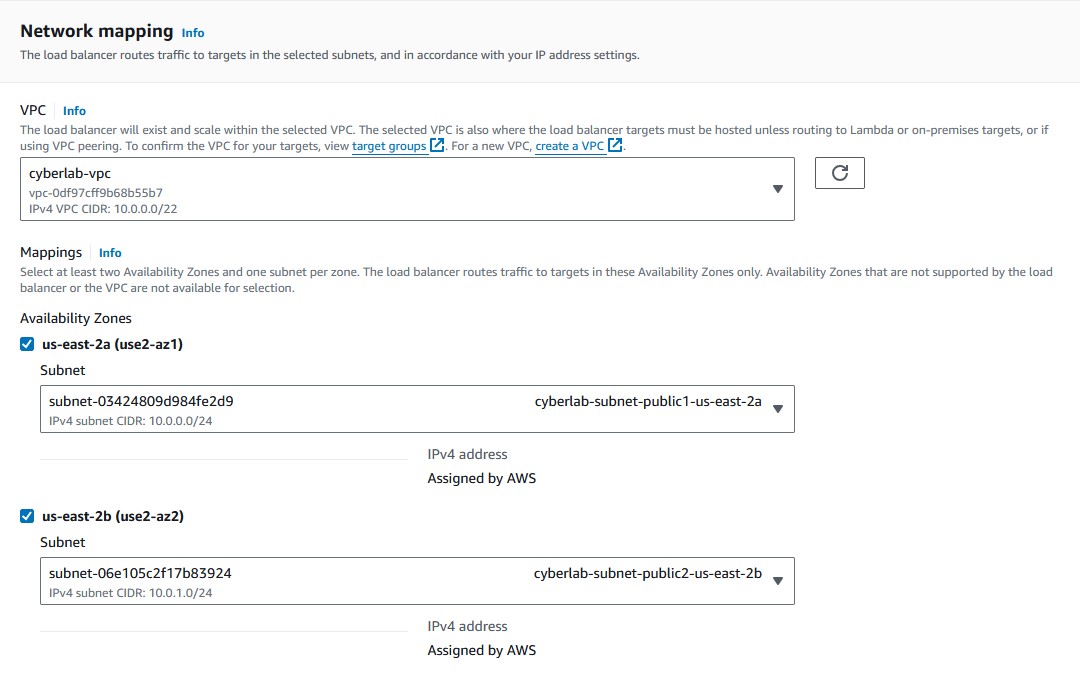
'IPv4'. - Choose your VPC or leave as default.
- Choose whichever public availability zones you prefer.
Create and Configure a Security Group
When you get to the security group portion, complete the below steps:
- Choose
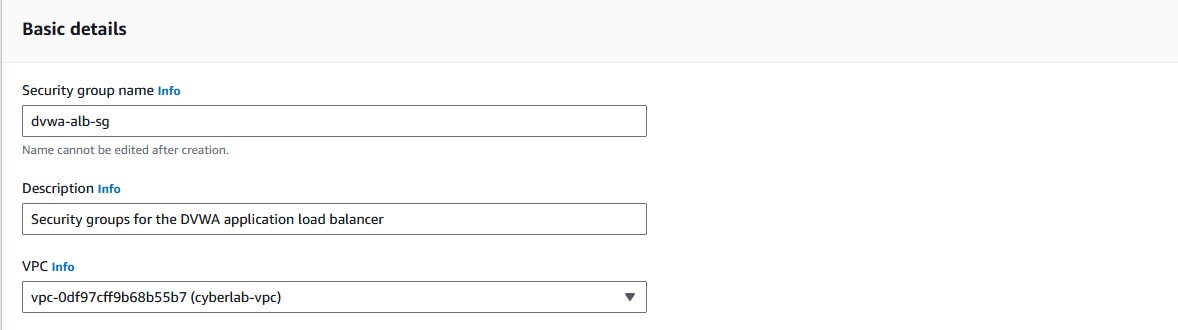
'create a new security group'. - Give that security group a name and a description and choose the same VPC you selected before. Then choose
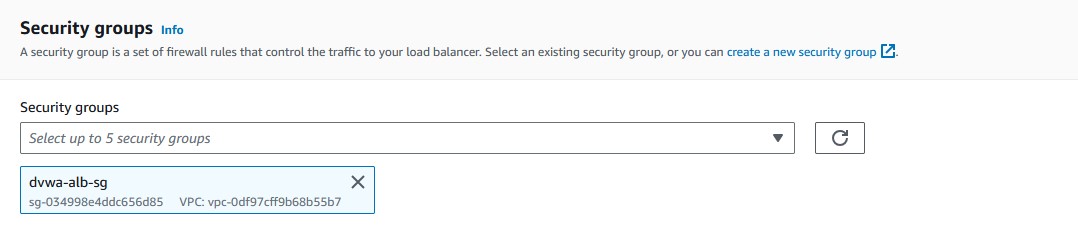
'Create security group'. Rules will be configured later. - Choose your newly created security group from the dropdown
'Security groups'menu.
Create and Configure a Target Group
Target groups are the resources that help with routing traffic. They’re kind of like resource pools and include instances or lambda functions and other various sets of resources.
When you get to 'Listeners and routing', complete the steps below to create a target group:
- Choose
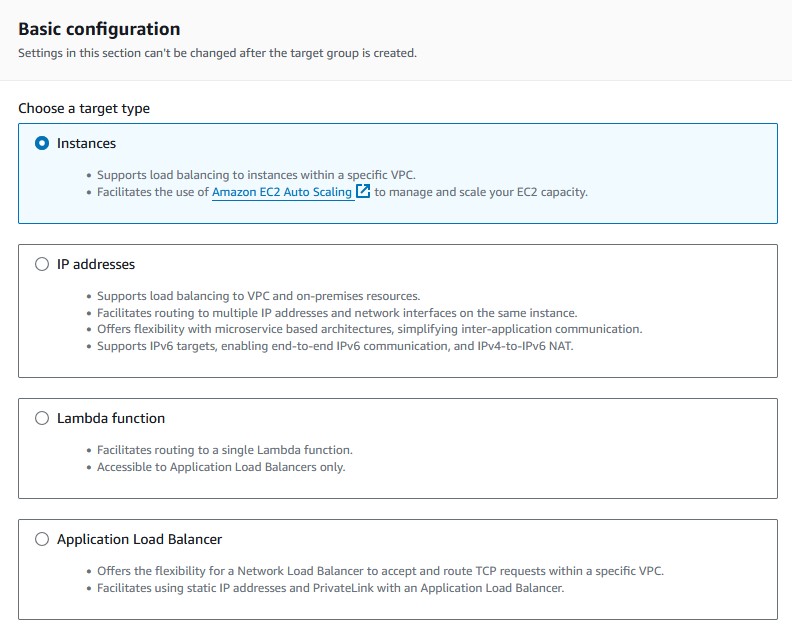
'Create target group'. - The default target type should be
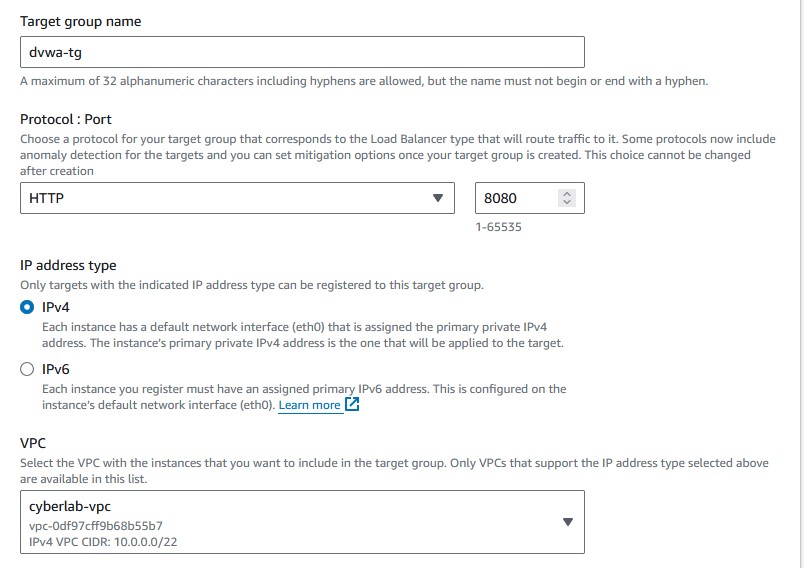
'instances'. Leave it at that. - Name your target group.
- If you have an application with a specific protocol/port you use to access it, then choose that port/protocol. My DVWA instances use port 8080, so I’ll leave it at that.
- Leave the
'IP address type'as'IPv4'. - Choose the same VPC you picked before.
- Leave the
'Protocol version'as'HTTP1'. - Leave the
'Health checks'section at the default. - Choose
'Next'at the bottom of the page.
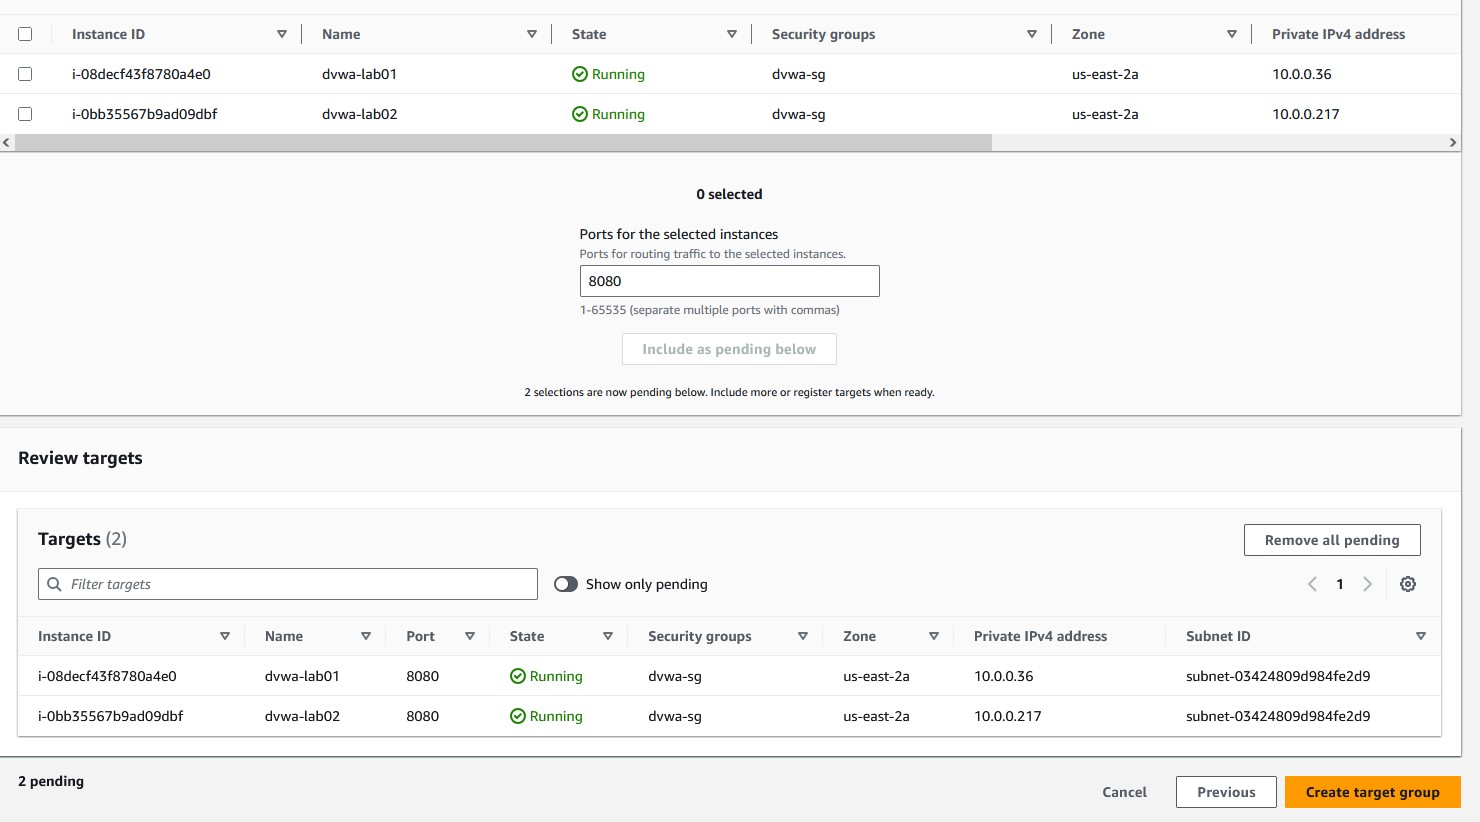
Registering Targets within the Target Group
To register your targets to the target group follow the steps below:
- Check the box for every EC2 instance you want to include in the target group. I have two DVWA instances, so I will select those.
- Keep the default port and choose
'Include as pending below'to add them to the'Review targets'list. - Choose
'Register pending targets'to finalize target registration. - Go back to the ALB setup page and choose your target group from the
'Select a target group'dropdown menu.
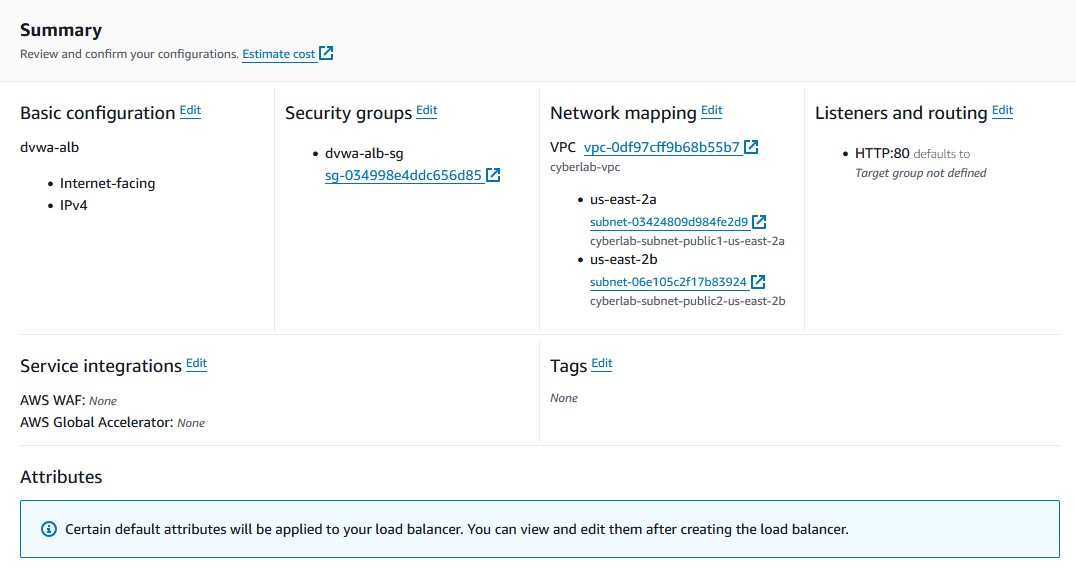
Reviewing and Creating Load Balancer
Go to the review section to confirm that you’ve set everything up correctly and then choose 'Create load balancer'. It might take a few minutes to provision, but then it should be ready to go!

Creating Security Rules
The ALB should become active shortly, but in the meantime, you can create the inbound rules for the security group.
In the navigation sidebar, go to 'Network & Security' and choose 'Security Groups'. Right click the security group you’ve created and edit the inbound and outbound rules as such:
'Inbound': HTTP, Port 80, Source type: My IP.'Outbound': HTTP, Port 8080, Source type: Anywhere-IPv4(0.0.0.0).
For the outbound rule, pick the TCP port that your instances used for accessing your application’s web interface. For me, it’s the default HTTP port.
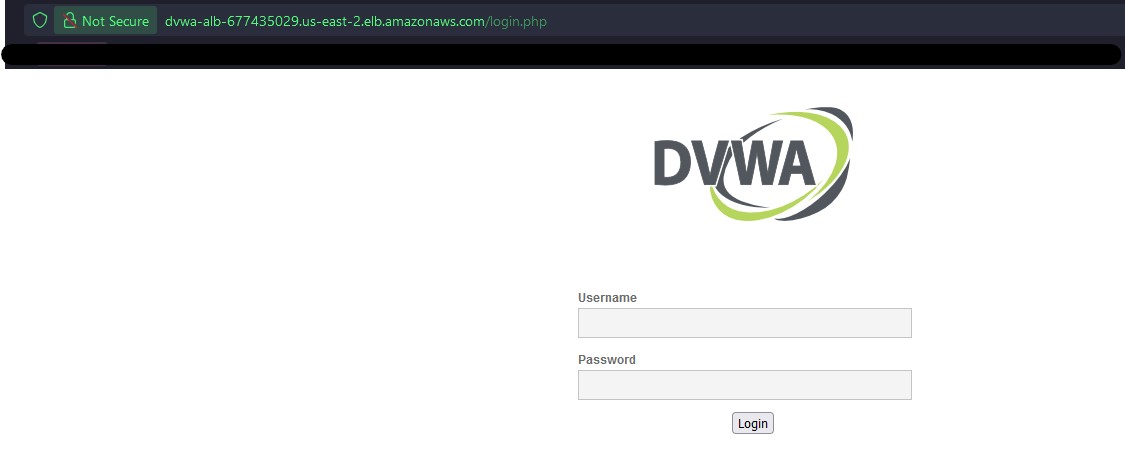
Testing the Load Balancer
Now that everything is in working order, you can test to make sure the load balancer works.
From the navigation sidebar, go back to 'Load Balancing' and choose 'Load Balancers'. Click on your load balancer and you will find the DNS name for it. You can click the little panel to the left of the DNS name to copy it. Paste it into your web browser, and boom! Your load balancer should now handle the traffic to your web applications. You’ll likely see the load balancer dynamically swap between the two applications. If you set up different reCAPTCHA key pairs, you’ll be able to tell which webpage the load balancer is currently handling since the public key is displayed on the setup page.
Conclusion
Let’s break down everything you’ve done in this guide.
- You set up a load balancer, security group, and target group through the load balancer launcher.
- The load balancer is now being used as the internet-facing component that will hide the TCP listening port (port 8080 or whatever you decided to use) of your application.
- The traffic is now only being utilized between the ALB and the target EC2 instances in your target group.
- Since the ALB is now the internet-facing component, it will listen to TCP port 80 (HTTP) from the public subnets of the VPC. TCP Port 80 and 8080 traffic flow is being allowed via the security group you created so that you can access your application through the load balancer DNS name in your web browser.
Now that you’ve had practice setting up an application load balancer you can try to set up other types of load balancers in the ELB family. These include network load balancers (NLB) and Gateway load balancers (GLB), and the now deprecated classic load balancer (CLB).
Food for Thought
Here’s some final key insights to remember about AWS load balancers:
- ALBs can use either support-based or path-based routing and scale with your traffic.
- ALBs have built-in SSL/TLS termination and integration to enhance your web application’s security.
- The ELB family has four varieties discussed above.
- NLBs are perfect for high-performance needs like when you need to handle millions of requests per second with minimal latency.
- GLBs can be used for stuff like integrating 3rd party visual appliances.
Choosing an ELB revolves around what kind of applications you use and the needs it can fulfill. Test each one out and see which is best for you.
You can find a variety of my security and networking posts under the 'categories' and 'tags' pages.