Syncing MySQL Databases with RDS & DMS for Load-Balanced Harmony
Getting on the Same Page
In cloud computing, harmony is key. The ability to seamlessly integrate your data sources can be crucial for maintaining efficiency and solid workflows. Wouldn’t it be nice if your load-balanced web applications could share the same database? Well, they can! I’ll show you how that’s possible with the AWS relational database service (RDS). It makes setting up your cloud databases a breeze 🍃🍃🍃.
There’s more to it. What if you already have a database running on your EC2 instances? Instead of relying on additional tools like AWS Database Migration Service (DMS), you can use familiar SQL tools to handle the migration directly. In this guide, I’ll walk you through setting up your RDS MySQL database and how you can use those tools to migrate your data effortlessly, ensuring a smooth transition without the need for complex services.
What is RDS?
RDS, or the Relational Database Service, is a fully managed service that makes setting up, operating, and scaling a relational database in the cloud easy. It’s compatible with several database engines, including MySQL, and offers automated backups, monitoring, and scaling.
If you’re looking for a robust database solution that integrates seamlessly with your AWS environment, RDS is your answer. For a full high-level overview, check out Amazon’s User Guide for RDS. It’s easier than ever to spin up an RDS MySQL database instance, so let’s dive on in!
Creating an RDS Database Instance
In the search bar, type rds to find the service, and then click on it to open the Amazon RDS dashboard. Click on Create database to open the database creation launcher. Follow the instructions below to set up your RDS MySQL database:
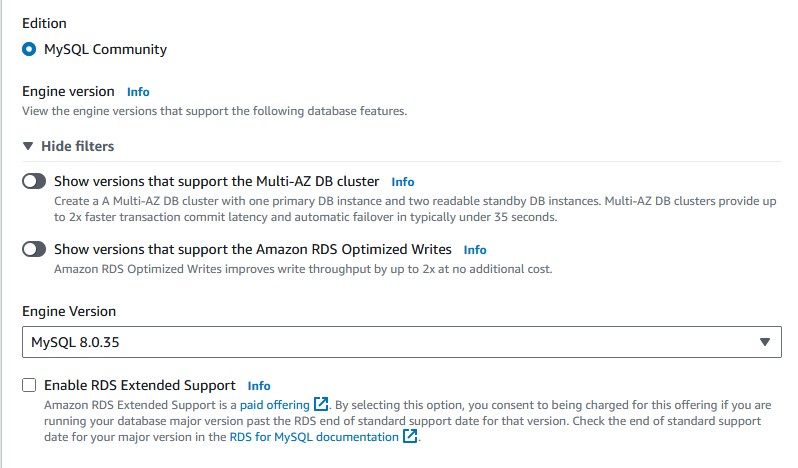
Engine Options, Templates, and Settings
- For the creation method, choose
Standard create. - Pick the
MySQLengine option. - Pick whichever engine version works for you.
- Choose the
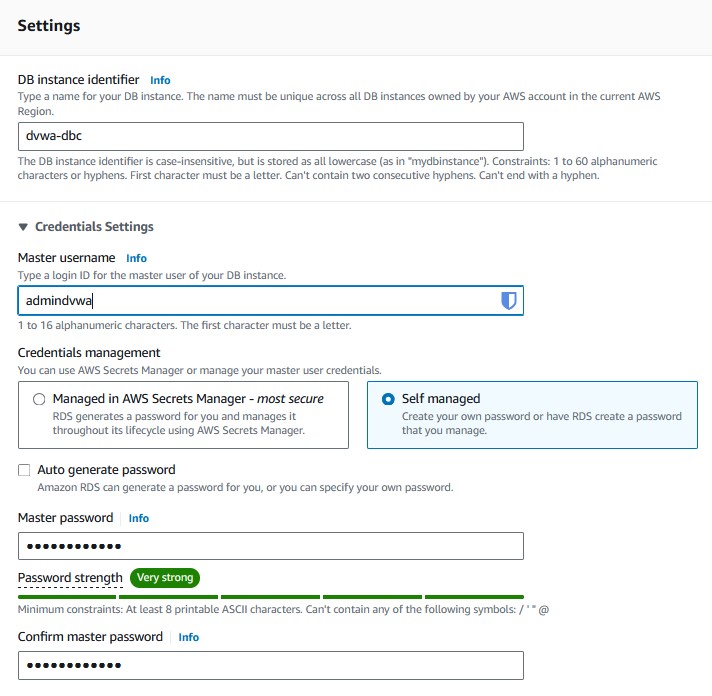
Free tiertemplate option, of course. - Name your DB instance something appropriate for its purpose.
- Leave the master username as is, or change it to your liking.
- Either allow AWS to manage passwords for the DB with Secrets Manager or create and manage your own passwords. NOTE: Secrets Manager has additional costs associated with it, so stick with your own password if you want this to remain free.

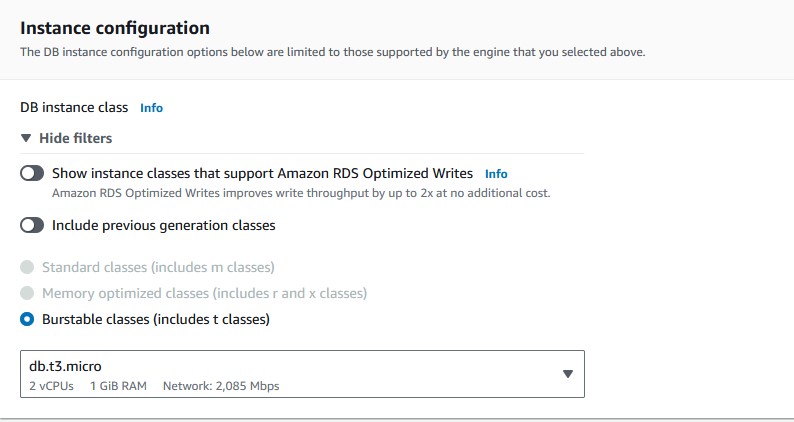
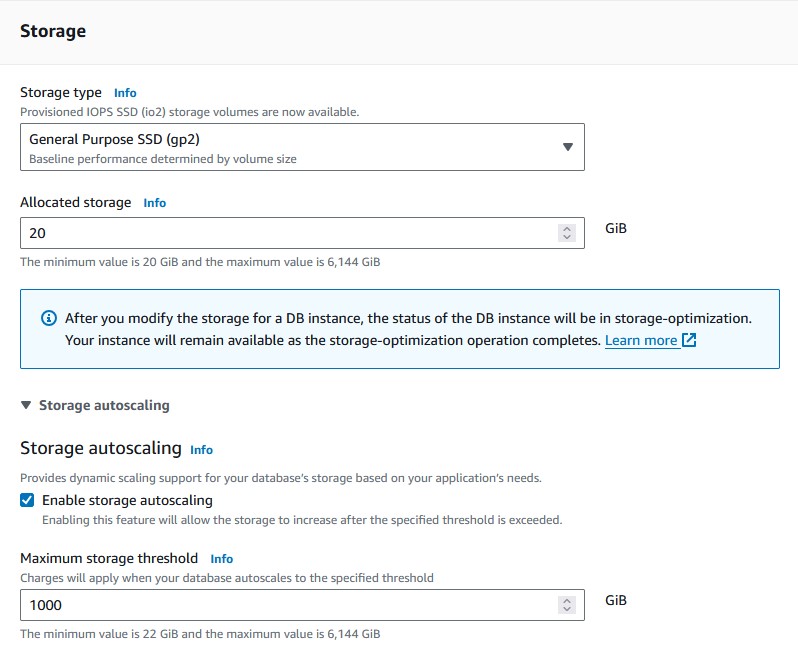
Instance Configuration and Storage
- Leave the instance configuration set to
db.t3.micro, which is eligible for the free tier. - Leave the storage settings at their default, with the option to automatically scale storage.
- Ensure
Multi-AZ deploymentis unchecked to keep within the free tier limits.
These settings will ensure you aren’t charged for anything outside the free tier. This is only meant to be a demo, after all.
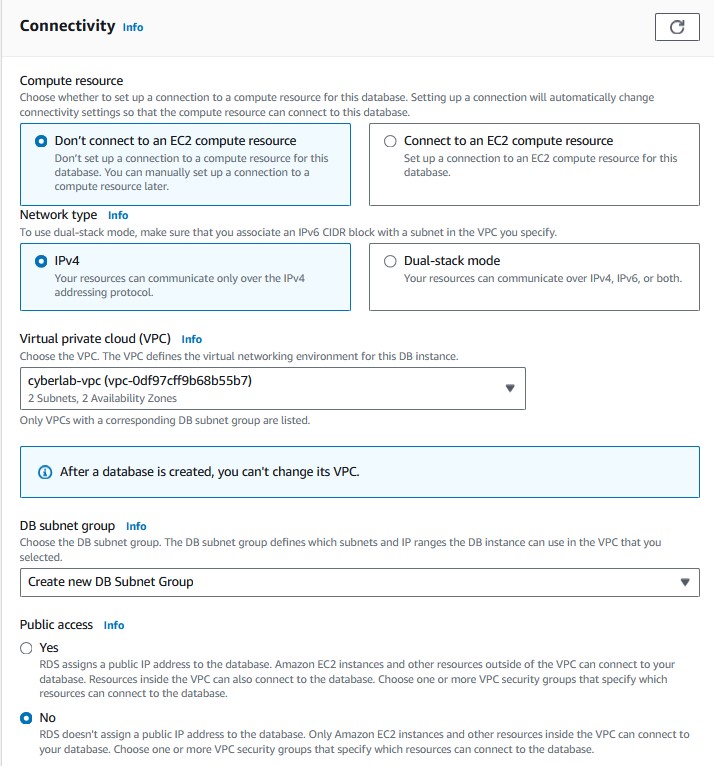
Connectivity
- Choose
Don't connect to an EC2 compute resource. That will be done later. - Leave the network type as
IPv4. - Choose your VPC; it can’t be changed later, so make sure the DB will be where you want it.
- Choose a subnet group if you have one in mind you would like to use.
- Leave
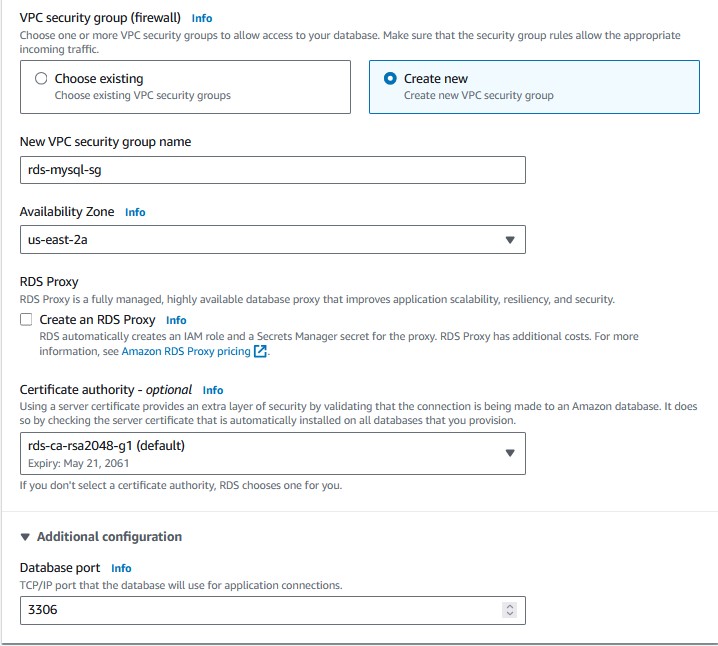
Public accessset toNo. - Choose a security group for your database. I created one called
rds-mysql-sg. The rules should automatically be created for you. - Pick a preferred availability zone if you have one.
- Choose your certificate authority if you have a preference; otherwise, leave it as the default.
You can safely ignore the estimated monthly charges. This is only what you will be charged if you somehow exceed the 750 free hours of use per month. It’s pretty hard to exceed.
The rest of the settings are unimportant for this lab walkthrough, so you can skip them. When you’re finished with the setup, click Create database. It might take a few minutes to launch, but your MySQL database instance is now being built.
Creating the New DVWA Database
Now this actually didn’t create a database, only the instance; However, the database is very easy to create. Download the MySQL client onto one of your two instances.
sudo apt install mysql-client -y
To connect to the database instance, run this command:
mysql -h <your-rds-endpoint.rds.amazonaws.com> -P 3306 -u <your_rds_username> -p
You should be greeted with a welcome message confirming your connection’s success. Let’s create a new database called 'dvwa' and then confirm the creation.
Preparing the Containers
Before any data can actually be migrated, some prep work will have to be done inside your container to allow remote database connections. The database will also require a backup.
Enabling Remote Database Connections:
Enter your container and make the following configuration adjustments at etc/mysql/mariadb.cnf:
[mysqld]
bind-address = <0.0.0.0>
You’ll also need to edit etc/mysql/mariadb.cnf.d/50-server.cnf and change the binding to '0.0.0.0' as well. These changes will allow the database server to accept connections from any IP address.
Save your changes and restart the MariaDB server:
service mysql restart
Access the database with the MySQL client as the root user. The password should be empty by default.
mysql -u root -p
Let’s change the permissions for the default database user 'app' which is identified by the password 'vulnerables'. This will allow that user to access all databases remotely:
GRANT ALL PRIVILEGES ON *.* TO 'app'@'%' IDENTIFIED BY 'vulnerables' WITH GRANT OPTION;
FLUSH PRIVILEGES;
SHOW GRANTS FOR 'app'@'%';
Don’t worry about replicating these steps on the second instance, we only need to transfer the contents of one database as both the databases should have the exact same schema, tables, and users.
mysql -h <your_private_instance_ip_address> -P 3306 -u app -p
Enter the password, and you should be inside the database. Remote connections are working!
Backing Up the Databases
It’s a good practice to backup your database before migrating data. Let’s do that now. Create a new path on your instance shell. It can be wherever you like. I’ll create one at /home/ubuntu/backups.
mkdir /home/ubuntu/backups
Download mysqldump, it’s a tool for backing up and restoring your MySQL databases:
sudo apt install mysqldump
Use mysqldump to backup your database:
docker exec -it dvwa mysqldump -u app -pvulnerables dvwa > /home/ubuntu/backups/dvwa_backup.sql
Check if the backup was actually created:
cat /home/ubuntu/backups/dvwa_backup.sql
You should see the contents of the dump including table structures and data from the 'guestbook' and 'users' tables. Once again, you don’t have to repeat this process for the second instance.
Migrating the Data with Mysqldump
You can simply use mysqldump to import the backup data into the dvwa database on the RDS database instance. Navigate to /home/ubuntu/backups, then use this command:
mysql -h <your-rds-endpoint.rds.amazonaws.com> -P 3306 -u <your_rds_username> -p dvwa < dvwa_backup.sql
Your data is now migrated. You can log in to your dvwa application and confirm that your data has been successfully migrated.
Configuring Your EC2 Instances
You now need to configure your EC2 instances to use your new RDS database. Use vi or another text editor to change your database configuration files to point to the RDS instance.
Setting Up Your Dockerized Application
Edit the config.inc.php file located at /var/www/html/dvwa/config.inc.php on both instances. Update the database connection settings to point to the RDS instance.
$db_host = "<your-rds-endpoint.rds.amazonaws.com>";
$db_user = "<your_rds_username>";
$db_pass = "<your_rds_password>";
$db_name = "dvwa";
Finally, restart your web applications:
docker restart dvwa
Conclusion
You now have a load-balanced application environment using AWS RDS for a shared MySQL database. With AWS DMS, your data can be migrated smoothly, and you’ve successfully transitioned to using a scalable cloud-based database solution.
For more in-depth information and tutorials, check out the AWS RDS documentation and AWS DMS documentation.
Happy cloud computing!