Setup DVWA on an EC2 Instance
The Cloud! It’s Perfect For Your Pen-testing Apps
Have you ever wanted to deploy your own vulnerable web application for penetration testing? Have you ever wanted to leverage the power of the cloud and modern tools like AWS WAF or Amazon CloudWatch to practice securing those very same apps? If you said “yes!” to either of those then this might just be the lab for you.
It’s Damn Vulnerable
It’s not a damn fine cup of coffee (sorry, agent Cooper), but it is a damn vulnerable web application, aka DVWA.
DVWA is one of the greats when it comes to open-source vulnerable web-applications. It’s built on PHP/MySQL and designed to help web developers understand secure coding practices and teach would-be penetration testers web vulnerability exploits like SQLi, XSS, IDOR, and more.
Why Deploy DVWA in the Cloud?
You might be wondering why I’ve chosen to set this up using AWS. Here’s Why:
Scalability & Flexibility: You can easily scale resources and deploy quickly using pre-configured environments and templates.
Accessibility: You can access DVWA from anywhere and deploy it closer to your location for optimal performance.
Integration: You can seamlessly integrate with security tools and automate tests using CI/CD pipelines.
Cost-Effectiveness: You only pay for what you use and benefit from managed services that handle updates and maintenance.
Security & Isolation: You can keep DVWA isolated and secure, with cloud backups ensuring quick recovery.
Educational Value: You can create diverse testing environments and gain hands-on experience to enhance your skills.
It seems like a no-brainer, so why don’t we get started on setting up DVWA in an EC2 instance. Maybe grab a cup of coffee while you’re at it?

EC2 Launch Templates For Quick Deployments
I want to show you a great way you can easily spin up new EC2 instances with ease through a feature called Launch Templates. Launch templates allow you to store your launch configuration parameters so you don’t have to go through the tedious work of specifying them every single time.
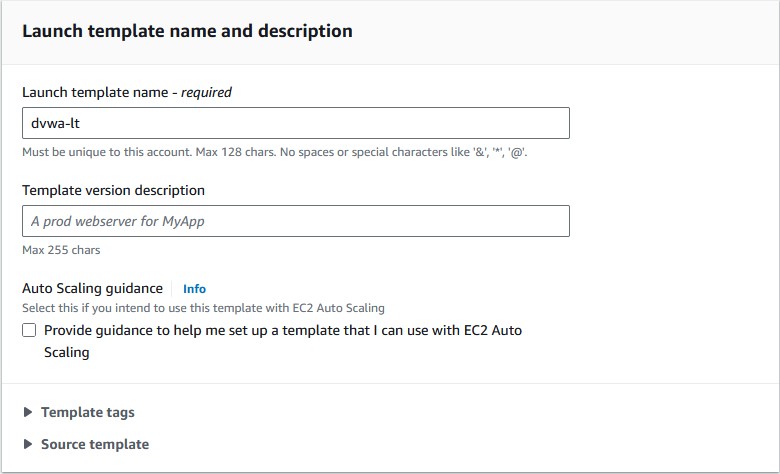
Search for EC2 to arrive at the EC2 dashboard. In the sidebar click Launch Templates and then click Create launch template. Here, you will be able to configure each setting for your instances.
Follow these instructions:
- Name your template.
- Choose your AMI; this is essentially a template that contains OS and other important configuration features. I’ll pick
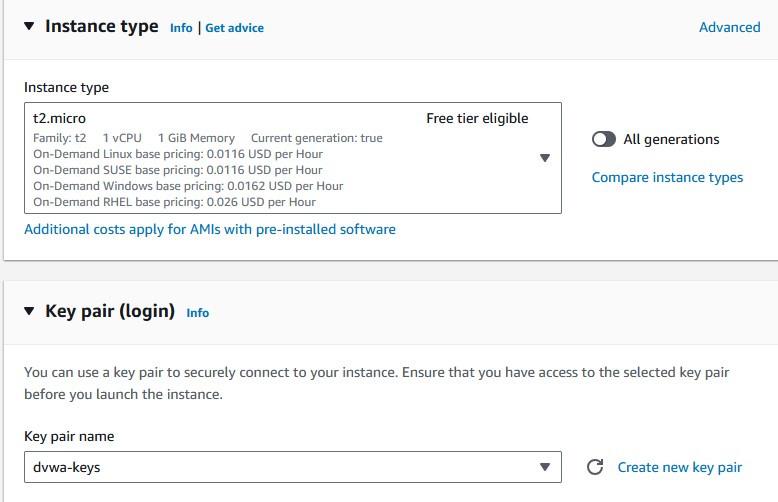
UbuntuunderQuick Start. - Pick your instance type. T2.micro is ✨free✨ and it’s a perfectly acceptable use case for DVWA. We don’t need much power.
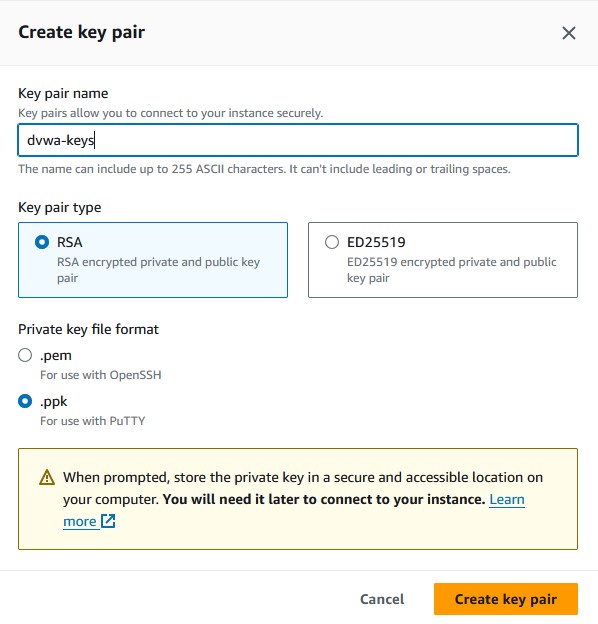
- Create a key pair. Pick the key pair encryption type. If you’re going to use a Linux application for SSH, then choose
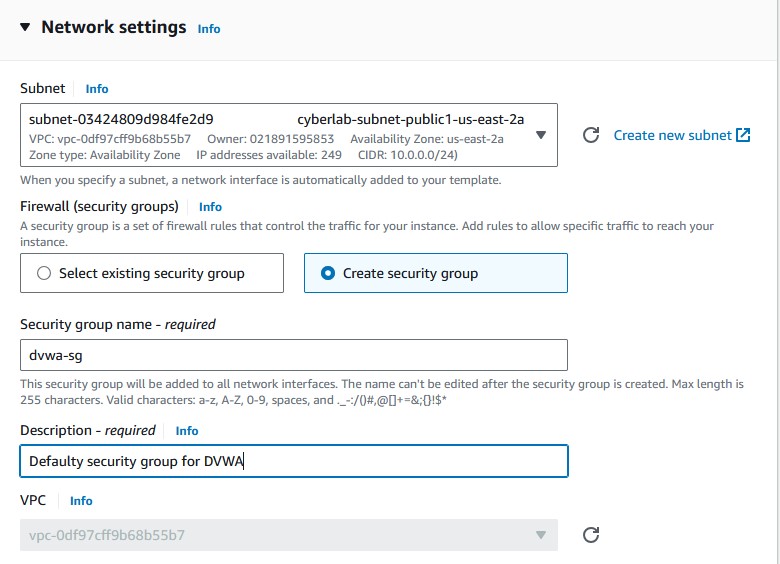
.pemfor the file format. If you’ll use Windows, then select.ppk. I’m using PuTTY on Windows, so I’ll pickRSAand.ppk. - Pick a specific subnet you prefer for the instances to be created on. I’ll pick the public1 subnet of the VPC I’ve created. You can choose a default subnet if you don’t have your own VPC.
- Create a security group. We will configure this later to allow inbound traffic to the instances. Give it an appropriate name and description.
- Under
Storage (volumes), expandVolume 1and up the size to 30 GiB. That’s the maximum storage space we can get before exceeding the free tier. - Check the summary and make sure it looks correct, and then click
Create launch template.


Creating the Instances
I’m actually going to create two instances here. Later on I will show you how to set up load balancing so that your application will have better availability, traffic distribution, and redundancy. For that, you will need the two.
Right-click on the template you just created and choose Launch instance from template. The launch template we made should handle everything. Just choose it from the Source template. Under Summary, increase the number of instances to create to two. It’s that easy with launch templates.
In the sidebar, click on Instances under Instances. You’ll find the two instances created here. You can name each of them by clicking the pencil icon when you hover over the Name field.
Setting up Elastic IPs
Elastic IPs are super handy because instead of having the instances release their public IPs every time you restart them, those IPs will remain static. This is great for applications you want to access often.
QUICK NOTE: Elastic IPs are not a free service after your first EIP. You will be charged $0.005 USD per hour for each additional active and inactive EIP you have. The first one should still be included in the free tier at the time of this writing. If you don’t want to be charged, then don’t create additional EIPs. If you want additional ones, release them after you’re done with this lab build to only incur minimal charges.
To set them up, follow these instructions:
- Under
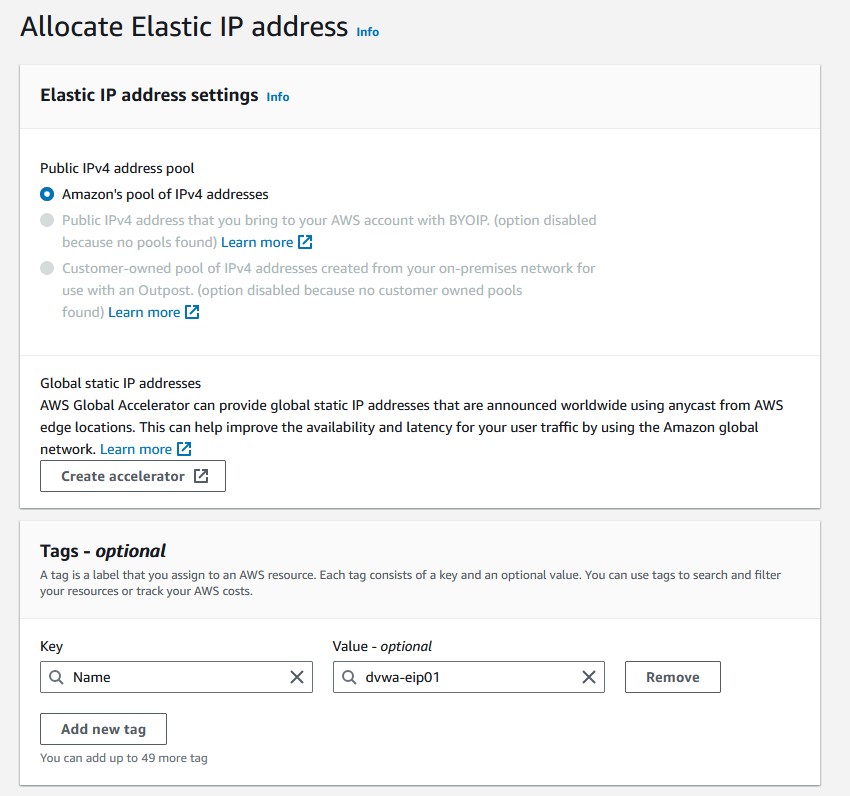
Network & Security, chooseElastic IPs. - Click
Allocate Elastic IP addressat the top. - To give the EIP a name, type
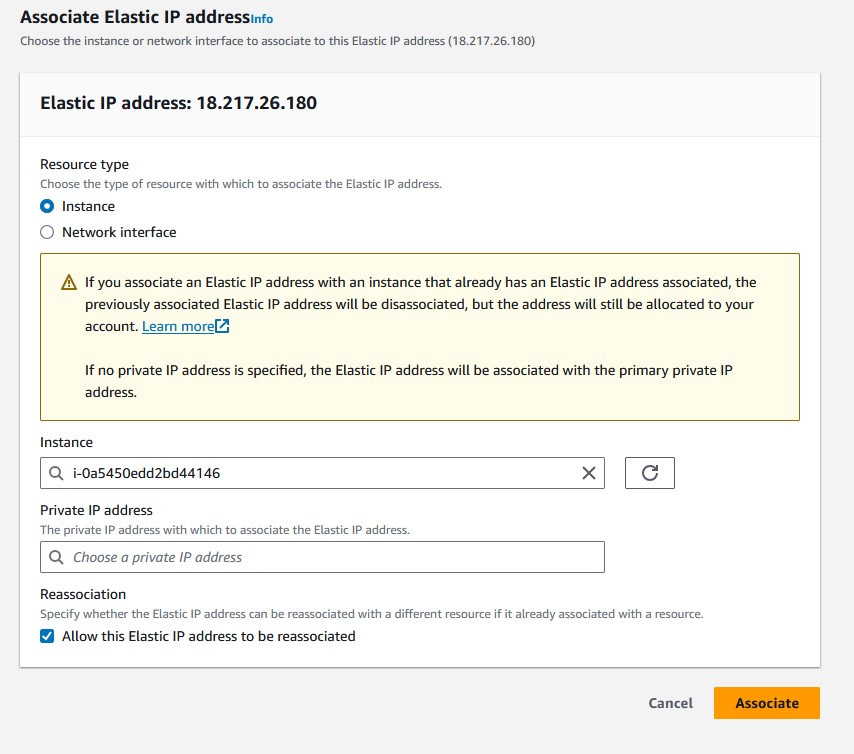
Namefor the key, and then enter your name for the value. - Right-click on that EIP and then choose
Associate Elastic IP address. - You’ll see the EIP given at the top. Choose the instance you want to associate with the EIP by clicking on it from the
Instancedropdown. - If you ever terminate an instance you might want to re-associate that EIP to a new one, so check the box at the bottom.
If you go back to the instances page, you’ll see that the public IPv4 of the instance is now the same as the EIP.
Security Group Inbound Rules
Before the instance can be launched, you’ll need to make sure some inbound rules are added to the security group created in the launch template. We need DVWA to be accessible on certain ports.
Go to Security Groups under Network & Security. Right-click on the security group to edit the inbound rules.
Configure these rules:
- SSH, Port 22, Source type: My IP
- HTTP, Port 80, Source type: My IP
- Custom TCP, Port 8080, Source type: Anywhere-IPv4(0.0.0.0)
- Custom TCP, Port 3306, Source type: My IP
These will allow you to SSH into the instance for setup and management and access the web portal of DVWA through HTTP and the mapped port 8080. Only you want to be able to access these things though, so specify your IP address.
DVWA Docker Installation
SSH into your first instance. I won’t show you how to do that. If you’re here I’m assuming you know how to do so already. Don’t forget to give your SSH client the key pair you created earlier. The default username for Ubuntu AMIs should just be Ubuntu, but you might want to check in case Amazon has changed that since this was written.
First, you will need to install Docker. There’s handy Docker installation guides on their website. The one for Ubuntu can be found here. Make sure to choose the appropriate installation instructions if you went with a different AMI.
You can find the Docker container I’ll be using at Dockerhub. Enter the commands below to install and run the container:
docker pull vulnerables/web-dvwa
docker run --name dvwa -d -p 8080:80 -p 3306:3306 vulnerables/web-dvwa
You’ll need to make some configuration changes inside the container. Execute this command to open a new bash shell for the container:
docker exec -it dvwa bash
Once inside the container, you will need to update the package archives as this specific DVWA image has outdated and deprecated ones. Enter the following command:
echo -e "deb http://archive.debian.org/debian/ stretch main contrib non-free\n\
deb-src http://archive.debian.org/debian/ stretch main contrib non-free\n\
deb http://archive.debian.org/debian-security/ stretch/updates main\n\
deb-src http://archive.debian.org/debian-security/ stretch/updates main" > /etc/apt/sources.list
Once that’s done, update your system and install your preferred file editor:
apt update
apt install nano
Navigate to the configuration directory at /var/www/html/config and use your file editor to open the config.inc.php file. Most of this can remain as is, but you’ll want to enter your reCAPTCHA keys, set the base security level to your desired starting point, and change the default username and password if you want. Some of the exercises involve reCAPTCHA, feel free to skip this step if you aren’t going to engage with them. Google offers reCAPTCHA keys as a free service to developers. You can learn more about it here. Once you’re done, save the file and use exit to terminate the shell and get back to the instance command line.
# If you are using MariaDB then you cannot use root, you must create a dedicated DVWA user.
#   See README.md for more information on this.
$_DVWA = array();
$_DVWA[ 'db_server' ]   = '127.0.0.1';
$_DVWA[ 'db_database' ] = 'dvwa';
$_DVWA[ 'db_user' ]     = 'app';
$_DVWA[ 'db_password' ] = 'vulnerables';

# Only used with PostgreSQL/PGSQL database selection.
$_DVWA[ 'db_port '] = '5432';

# ReCAPTCHA settings
#   Used for the 'Insecure CAPTCHA' module
#   You'll need to generate your own keys at: https://www.google.com/recaptcha/admin/create
$_DVWA[ 'recaptcha_public_key' ]  = '';
$_DVWA[ 'recaptcha_private_key' ] = '';

# Default security level
#   Default value for the security level with each session.
#   The default is 'impossible'. You may wish to set this to either 'low', 'medium', 'high' or impossible'.
$_DVWA[ 'default_security_level' ] = 'low';
Final Steps
Now is the time to head over to your web browser. Enter <your_public_ip_address>:8080/dvwa. If everything worked correctly, then congrats! You should be seeing the DVWA login page.
Enter the default username and password (admin and password) or whatever you changed it to. Go to the Setup / Reset DB page, and click the Create / Reset Database button at the bottom of the page. Your database should be created and everything should be ready to go!
Use this command to stop your instance after use:
docker stop dvwa
Future posts pertaining to this lab build will deal with elastic load balancing, so you’ll need to configure the second instance. I’ll leave you to it. See if you can challenge yourself by referencing this page as little as possible when you build it. I’d recommend using a separate pair of reCAPTCHA keys for this one. It will be handy for future posts regarding this lab. Good luck out there!
I’ll be posting a lot more about AWS ELB and WAF if you want to see an extension of this simple lab setup. Stay tuned and check out my other security and networking posts under the 'Categories' and 'Tags' pages.